# Building Modern Serverless API's with AWS: DynamoDB, Lambda, and API Gateway(Part 5)
Welcome to the last part in **"Building Modern Serverless API's with AWS"** series.
Here's a recap of what we've done so far.
In [Part 1](https://phatrabbitapps.com/building-modern-serverless-apis-with-aws-dynamodb-lambda-and-api-gatewaypart-1) of this series, we modeled and designed access patterns for our application entities.
In [Part 2](https://phatrabbitapps.com/building-modern-serverless-apis-with-aws-dynamodb-lambda-and-api-gatewaypart-2), we designed the primary key and Global Secondary Index, created a sample database schema using NoSql Workbench, and saw clearly each access pattern for our app.
In [Part 3](https://phatrabbitapps.com/building-modern-serverless-apis-with-aws-dynamodb-lambda-and-api-gatewaypart-3), we started coding up our API. We created a project using SAM and wrote a couple of scripts to Create a user, Get a user by ID and also create a post
In [Part 4](https://phatrabbitapps.com/building-modern-serverless-apis-with-aws-dynamodb-lambda-and-api-gatewaypart-4), we created scripts to update posts, fetch all posts by a given user, thereby returning a multi Entity response. We built and deployed our API with SAM. And tested some of the API endpoints using PostMan.
In this post, we would write and tests scripts for
- Create Comments
- Query Comments for a given post
- Query Posts with a given status. (Global Secondary Index)
Create Comment
One of the access patterns for our API was to be able to add comments to a post. It's a social media API, at least, that should be possible.
Create a file in the comments folder called create.py and type in the following code
```
import json
import logging
import os
import time
import uuid
import boto3
dynamodb = boto3.resource('dynamodb')
def create_comment(event, context):
data = json.loads(event['body'])
if 'commentText' not in data:
logging.error("Validation Failed")
raise Exception("Couldn't create a comment")
timestamp = str(time.time())
table = dynamodb.Table(os.environ['TABLE_NAME'])
item = {
'PK': "POST#{}#{}".format(data['postId'],data['timestamp']),
'SK': "COMMENT#{}#{}".format(str(uuid.uuid1()),timestamp),
'commentId': str(uuid.uuid1()),
'postId': data['postId'],
'userId': data['userId'],
'commentText': data['commentText'],
'status': data['status'],
'createdOn': timestamp
}
# write the post to the database
table.put_item(Item=item)
# create a response
response = {
"statusCode": 200,
"body": json.dumps(item)
}
return response
```
Nothing new to talk about. It's the same as Create User or Create Post. Maybe take note of the PK and SK values.
Here's how you configure the CreateCommentFunction in the SAM template.yaml file.
```
CreateCommentFunction:
Type: AWS::Serverless::Function # More info about Function Resource: https://github.com/awslabs/serverless-application-model/blob/master/versions/2016-10-31.md#awsserverlessfunction
Properties:
CodeUri: comments/
Handler: create.create_comment
Runtime: python3.8
Policies:
- DynamoDBCrudPolicy:
TableName: data
Events:
HttpPost:
Type: Api # More info about API Event Source: https://github.com/awslabs/serverless-application-model/blob/master/versions/2016-10-31.md#api
Properties:
Path: /comment
Method: post
```
Fetch Comments For Posts
Being able to see comments made under a post is the sweetest part of any social media application. Create a file in the **posts** folder called **get_comments_post.py** and type in this code
```
import os
import json
import boto3
import decimalencoder
from botocore.exceptions import ClientError
from boto3.dynamodb.conditions import Key
dynamodb = boto3.resource('dynamodb')
def get_post_comments(event, context):
# print(event)
# print(event['pathParameters'])
print("print this ")
table = dynamodb.Table(os.environ['TABLE_NAME'])
postId = 'POST#{}#{}'.format(event['pathParameters']['id'],event['pathParameters']['timestamp'])
print(postId)
result = table.query(
KeyConditionExpression=
Key('PK').eq(postId),
ScanIndexForward=True
)
# create a response
response = {
"statusCode": 200,
"body": json.dumps(result["Items"],
cls=decimalencoder.DecimalEncoder)
}
print(response)
print("Query successful.")
return response
```
At the very top of the script, we import boto3 and a couple of utility classes that we'll be needed in our script. Next, we get the post id sent through the API endpoint. We query our table while assigning a key condition expression that gets all comments for any post whose ID is equal to the postId + timestamp sent through the API endpoint.
Then we configure the function in the SAM template.yaml like so
```
GetPostCommentsFunction:
Type: AWS::Serverless::Function # More info about Function Resource: https://github.com/awslabs/serverless-application-model/blob/master/versions/2016-10-31.md#awsserverlessfunction
Properties:
CodeUri: posts/
Handler: get_comments_post.get_post_comments
Runtime: python3.8
Policies:
- DynamoDBCrudPolicy:
TableName: data
Events:
HttpPost:
Type: Api # More info about API Event Source: https://github.com/awslabs/serverless-application-model/blob/master/versions/2016-10-31.md#api
Properties:
Path: /posts/{id}/{timestamp}/comments
Method: get
```
Fetch Posts by Status
When we modeled our data, we assigned a status attribute to the post entity. When a post is created, the status = created. When it's updated or deleted, status equals updated or deleted respectively.
One of the access patterns for our API was to get all posts by status. The status value is set to **created** when a post is created, **updated** when a post is updated, and **deleted** when a post has been deleted.
However, the status attribute is neither a Partition nor a Sort Key. So by default, we can't use it to query anything. But, by creating a Global Secondary Index(GSI) with the status as Hash Key, we create a possibility to retrieve all created or updated, or deleted posts.
While creating the database table in Part 2, we created a GSI for status. Here's how it looked like.
```
GlobalSecondaryIndexes:
- IndexName: "GSI1"
KeySchema:
- AttributeName: "status"
KeyType: "HASH"
Projection:
ProjectionType: "ALL"
ProvisionedThroughput:
ReadCapacityUnits: "1"
WriteCapacityUnits: "1"
```
The Global Secondary Index name is **"GSI1"**. The status is a HASH Key.
With that in place, let's look at the script.
Create a file called fetch_posts_by_status.py inside the posts folder and add type in the following code.
```
import os
import json
import boto3
import decimalencoder
from botocore.exceptions import ClientError
from boto3.dynamodb.conditions import Key
dynamodb = boto3.resource('dynamodb')
def fetch_post(event, context):
# print(event)
# print(event['pathParameters'])
print("print this ")
table = dynamodb.Table(os.environ['TABLE_NAME'])
result = table.query(
IndexName="GSI1",
KeyConditionExpression=
Key('status').eq(event['pathParameters']['status']),
ScanIndexForward=True
)
# create a response
response = {
"statusCode": 200,
"body": json.dumps(result["Items"],
cls=decimalencoder.DecimalEncoder)
}
print(response)
print("Query successful.")
return response
```
Take note of the query **IndexName**. That's the index name we set when we created the GSI above.
Lets now declare this function in the SAM template.yaml file.
```
FetchPostsByStatusFunction:
Type: AWS::Serverless::Function # More info about Function Resource: https://github.com/awslabs/serverless-application-model/blob/master/versions/2016-10-31.md#awsserverlessfunction
Properties:
CodeUri: posts/
Handler: fetch_posts_by_status.fetch_post
Runtime: python3.8
Policies:
- DynamoDBCrudPolicy:
TableName: data
Events:
HttpPost:
Type: Api # More info about API Event Source: https://github.com/awslabs/serverless-application-model/blob/master/versions/2016-10-31.md#api
Properties:
Path: /posts/status/{status}
Method: get
```
And that's all. Be sure to grab the complete code from Github.
https://github.com/trey-rosius/modern_serverless_api
You can go-ahead to build and deploy the API.
```
sam build --use-container
```
```
sam deploy --guided
```
As always, I do my testing with Postman.
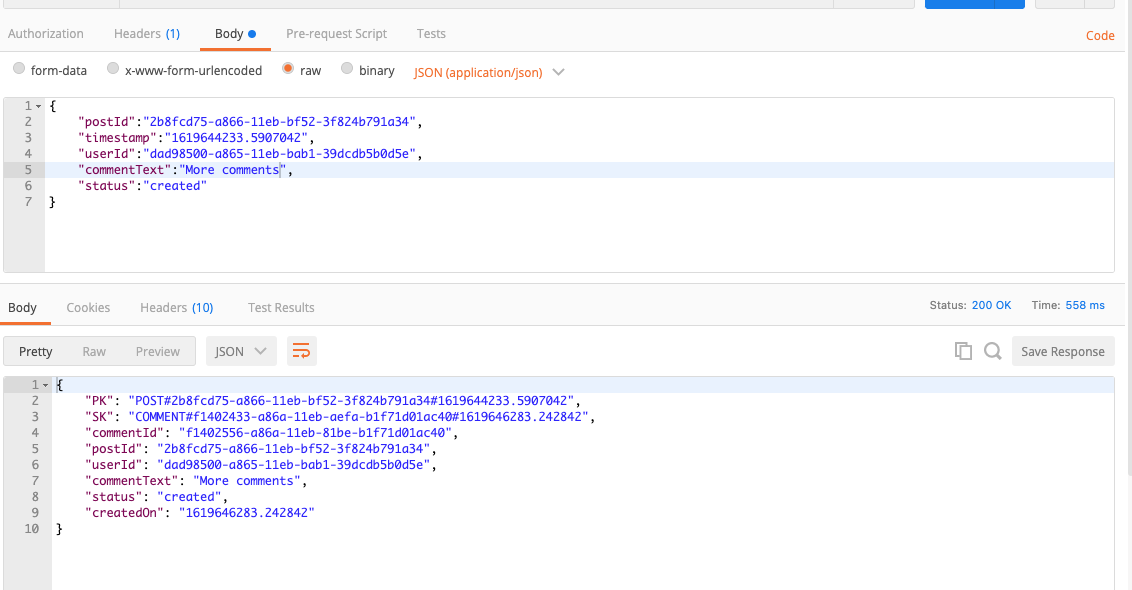
Create Comment Testing
endpoint ../comment
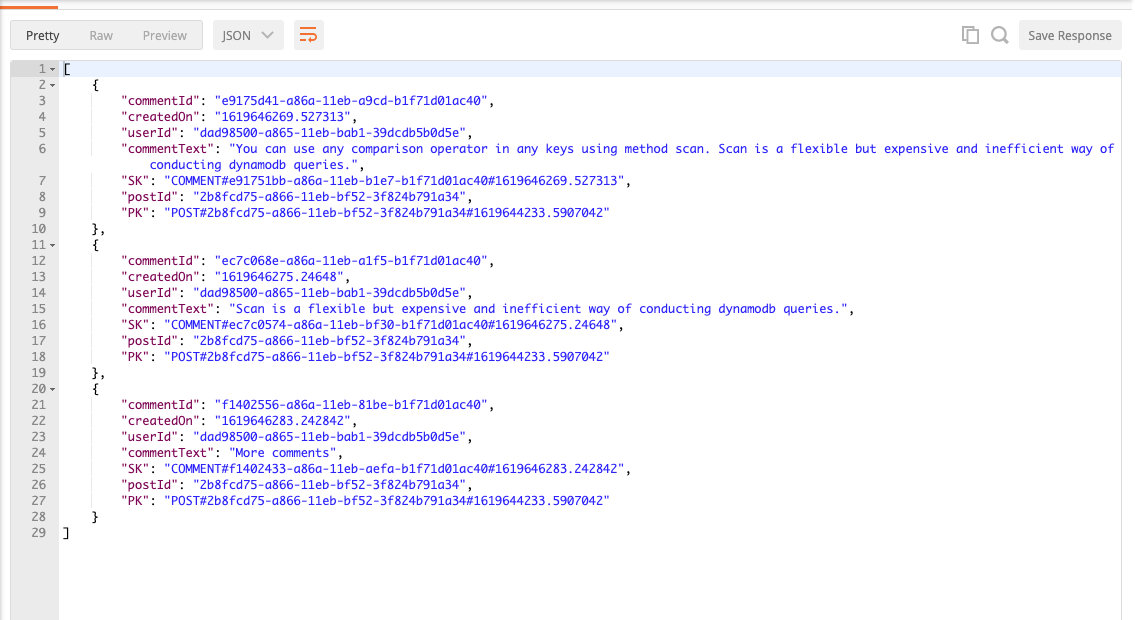
Fetch Post Comments Test
endpoint .../posts/2b8fcd75-a866-11eb-bf52 3f824b791a34/1619644233.5907042/comments
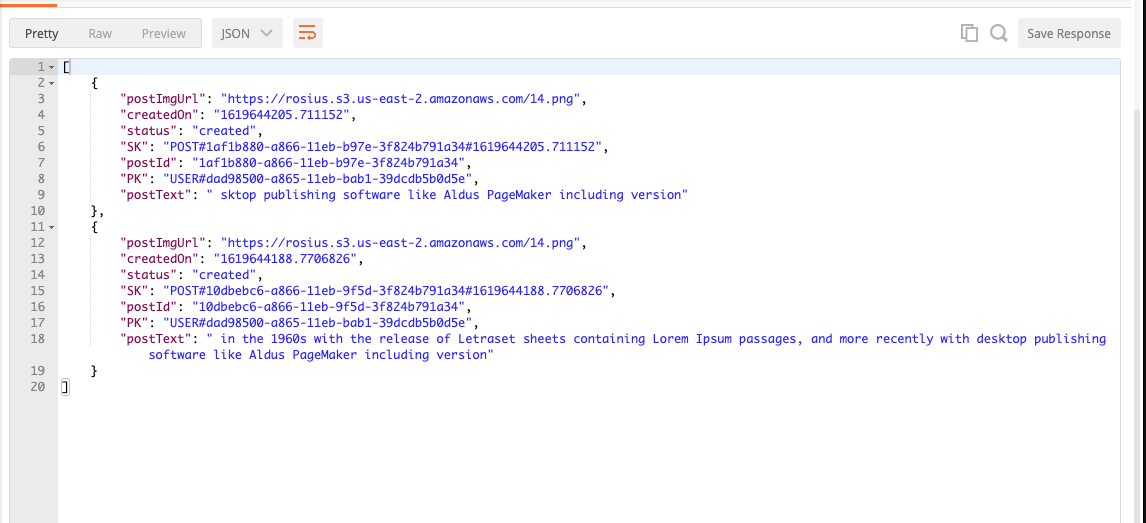
Fetch Post by status Test
endpoint ..../posts/status/created
[Complete Source Code](https://github.com/trey-rosius/modern_serverless_api)
Conclusion
That's all folks. In this series, we looked at
- Modeling Entities
- Design and Creating Access Patterns for Entities
- DynamoDB single table design
- Performing CRUD operations on a DynamoDb table.
- Creating and Querying a Global Secondary Index
- Building a serverless API with SAM.
- Testing the API with Postman.
I had lots of fun creating this series and I do hope you felt the same, reading and practicing along.
I'm still working on my blogging/teaching skills, so if I didn't explain some concepts in a cool and detailed manner, please bear with me I'll get better with time.
If you loved this series, please leave feedback or like. Also, do leave feedback, in case you find mistakes. I'll be happy to correct them.
In the next article, we'll consume this API in a mobile and web application. So stay tuned.
Till next time, my brothers and sisters ✌🏿