Fullstack Serverless app with Flutter, Serverless Framework and Upstash(REDIS)(PART 1)
I love creating and writing about the creation of software.
Introduction
Hi there,
In this post, we'll be building a serverless mobile application with Flutter, Serverless Framework,Upstash and Redis for storing data.
What's UpStash ?
Upstash is a serverless Database for Redis. With Upstash, you pay per-request. This means you're not charged when the database isn't in use.Upstash configures and manages the database for you.
It's a strong alternative to other databases like DynamoDB and Fauna, with advantages such as
- low latency
- Ease of use, just like REDIS API's.
Here's a detailed document comparing Upstash with alternative cloud-based solutions, giving you a clear reason as to why you should choose it for your next project.
You can also check out this article making a comparison of all the available serverless databases out there
With Upstash,
- You start free and pay only for what you use
- It has Fast, Durable Storage
- You can access your database from anywhere around the globe, with low latency due to global Databases and Edge Caching.
Get Started on Upstash For Free Today
In order to effectively build applications on Upstash, you must understand Redis.
So it's just right we do a brief introduction to Redis and see how we'll be using it within our Upstash app.
If you prefer something more detailed and in-depth, I recommend the official Redis Website
Redis is an open source (BSD licensed), in-memory data structure store, used as a database, cache, and message broker.
It supports a ton of data structures such as
- strings
- hashes
- lists
- sets
- sorted sets with range queries
- bitmaps
- hyperloglogs
- geospatial indexes
You interact with a Redis database using commands and save data in a key value format, where the key can be a string and the value, any data structure supported by Redis.
For example, I can use the Redis command SET to store the value of my surname like so
SET surname Rosius
where surname is key and Rosius is value.
One very important thing to take note of with Redis is, always store your data in a way that you can easily retrieve it.
There is no direct way to search for a key by value in Redis.
Data in Redis is stored permanently. So I can retrieve the data stored at key surname like so
GET surname
Results to 'Rosius'
We can also delete the value stored at key surname like so
DEL surname
Say we want to increment the likes of a post. Here's how we can easily do it, using the INCR command, which is atomic.
SET likes 10
INCR likes => 11
INCR likes => 12
INCR likes => 13
Firstly, we set the initial value of likes to 10, and then we atomically increment the value of likes.
Now, you'll probably think that it's also possible to increment likes this way.
x = GET likes
x = x + 1
SET likes x
This is completely fine, as long as you are the only one using your application.Which is never the case right.
Once there are >2 people incrementing that same like, the above process(GET,Increment,SET) is no longer atomic.
So,
x = GET likes (yields 10)
y = GET likes (yields 10)
x = x + 1 (x is now 11)
y = y + 1 (y is now 11)
SET likes x (likes is now 11)
SET likes y (likes is now 11
From the code above, user 1 gets the value of likes which is 10, and stores it in a variable x, and at the same time, user 2 gets that same value of likes, which is also 10, and stores it in a variable y.
User 1 adds 1 to the value of likes(x) and sets the new value, which is now 11.
User 2 does same.
So the value of likes is 11.
But is that really correct? Remember that likes have been incremented twice by 2 different users.
The value of likes had to be 12, and not 11. That's why Redis provides the INCR command, which is atomic and solves such issues.
Hash DataType
Redis hashes are equivalent to the hashes of other programming languages.Basically, they're made up of a collection of fields associated with values:For Example, here's how I will store user profile information in a Hash.
HMSET userProfile:100034  "userId" 100034 "username" "Rosius Ndimofor"
            "firstName" "Rosius" "lastName" "Ndimofor" "profilePic" "rosius.jpeg"
Firstly, the key for our Hash is userProfile:100034, then we have key value pairs all through. For example "userId" is the key and 100034' is the value.
<br>
We can retrieve specific user profile information such as first name by using theHGETcommand anduserId` like so.
userId = 100034
HGET userProfile:{userId} firstName
Or We can retrieve all user profile information for a particular user using the GETALL command like so
userId = 100034
HGETALL userProfile:{userId}
List Data Type
Earlier, I said that, in Redis, it's very important to save data the way you plan on retrieving it.What if we want to get all the users on our platform?
We've just used a Hash data structure to save user profile information. Now we need to get all the users on our system.
The easiest way to accomplish this is to save the userId's of every user in a List using the command LPUSH(stands for Left Push) like so
LPUSH "users" userId
Getting all users from our List, we use the command LRANGE like so
LRANGE "users" 0 -1
These are just a few of the commands we'll be using in our application. But I urge you to go through the Redis official site to see the rest of the commands and learn how to use them.
So how's our full-stack application supposed to function?
I'm glad you asked. So today, we'll start by creating a CRUD API. Here's the use case.We have 2 entities.
Users and Posts.
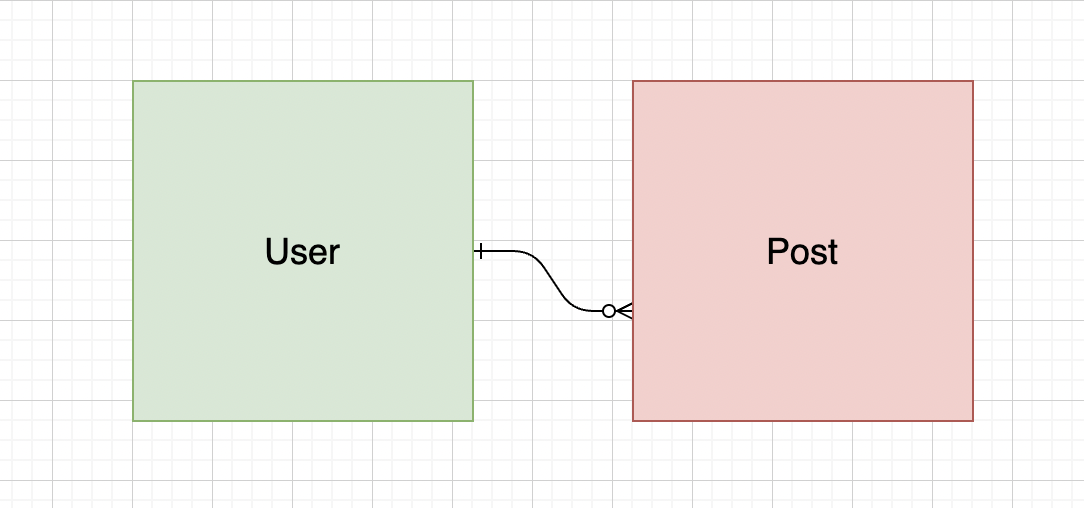
They share a one to many relationship. So one user can have multiple posts,and one post can only belong to one user.
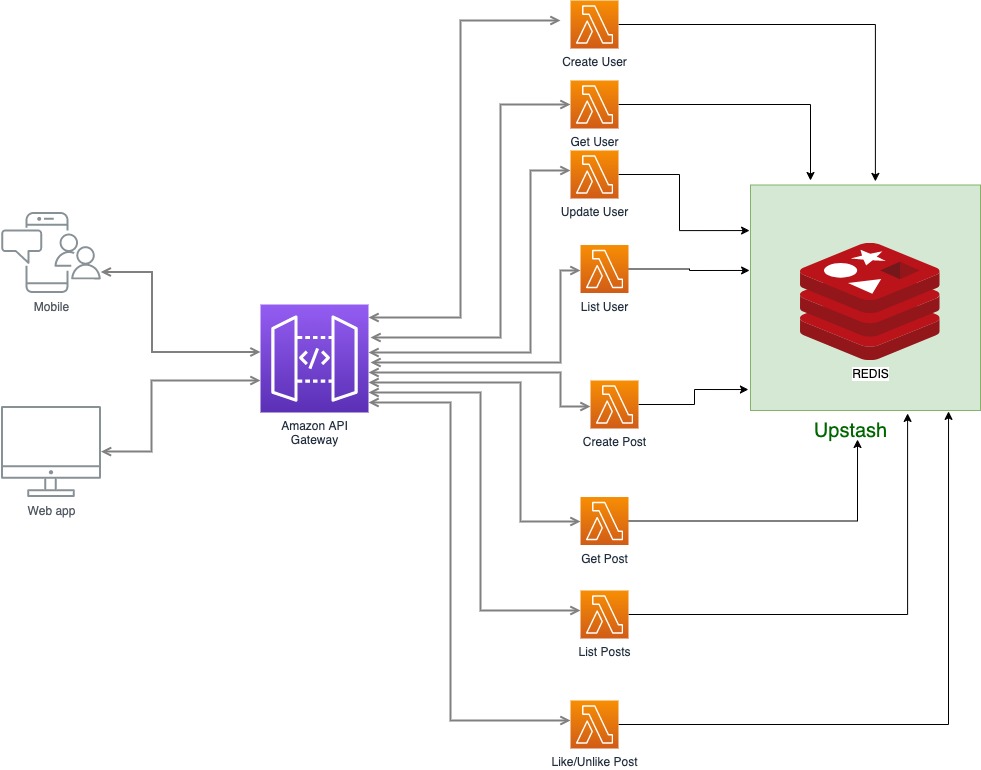
A user is allowed
- Create an account. No authentication. You can add authentication with AWS Cognito or Auth0.
- Update their Account
- Get their account
- Create a post
- Update a post
- Like a post
- Get a list of all posts
Here's the solutions architectural view
 So let's get Started.
Create an Upstash Account
Please create a free Upstash account here Upstash Login.After creating your account, create an Upstash database.
You are allowed to create only one database in the free tier.
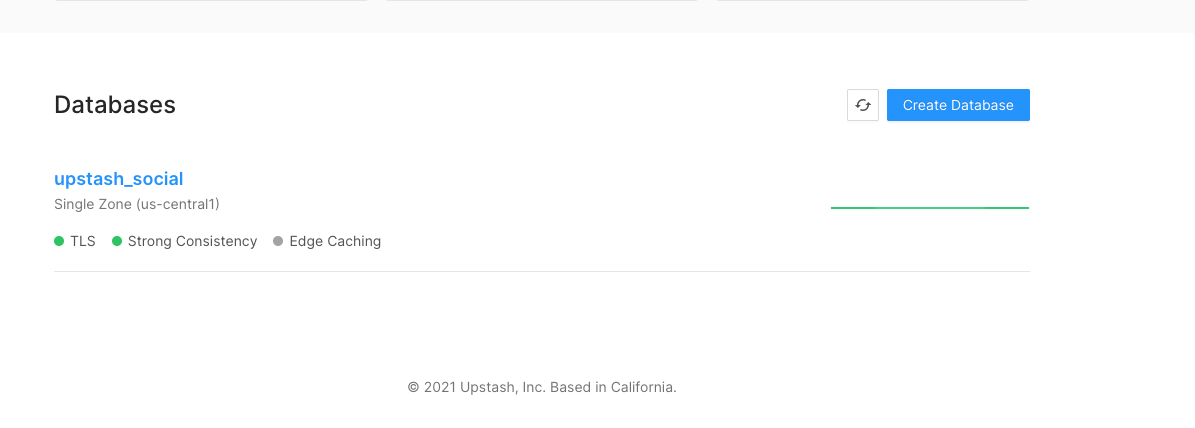 Take note of your Redis database endpoint. It should look somehow like this.
rediss://:2c9bb162c2444bf7ab689640bb2ead23@gusc1-smashing-bee-30249.upstash.io:00049
Creating a Serverless Project
Prerequisites
Please install these dependencies before proceeding- AWS CLI
- NodeJS
- Serverless CLI
Create a new serverless project using the command below and following the prompts.
serverless
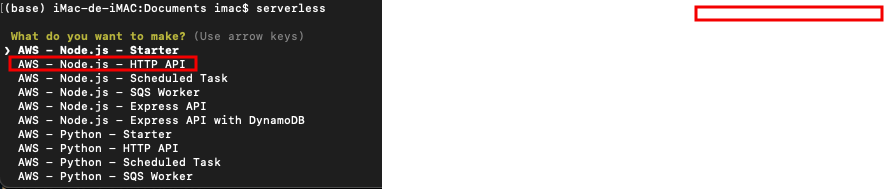
Select nodejs HTTP API, give your project a name, and hit enter.
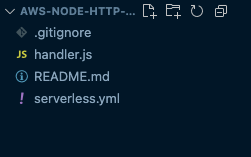
Here's the initial structure of my serverless project.
Inside that folder, initialize a new node project with the command
npm init
Next, install the redis client with
npm install ioredis
Also, install a universally unique Identifier(uuid) dependency. We'll be using it extensively in this project.
npm install uuid
Now, add your Redis Database Endpoint as an environment variable in serverless.yml file like so.
provider:
  name: aws
  region: us-east-1
  stage: dev
  runtime: nodejs12.x
  lambdaHashingVersion: "20201221"
  environment:
    REDIS_CLIENT: "rediss://:2c9bb162c2444bf7ab689640bb2ead23@gusc1-smashing-wasp-30249.upstash.io:30249"
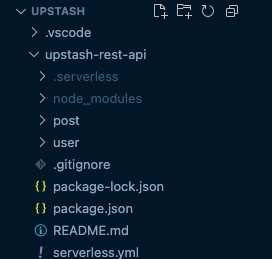
Next, Create 2 folders inside your project called users and posts. Both of these folders would hold lambda functions for their respective use cases.
Let's get started creating our API enpoints
Create User
We want users to be able to create an account for themselves.No authentication. All they have to do is submit their
- username
- first name
- last name
- profile picture
Create a file in the user folder called create.js.
At the top of the file, import and instantiate the redis client using the redis database URL we saved as an environment variable in serverless.yml file.
"use strict";
const uuid = require('uuid');
var Redis = require("ioredis");
if (typeof client === 'undefined') {
    var client = new Redis(process.env.REDIS_CLIENT);
}
We also import the uuid dependency, because we'll be using it to create unique ID's for users.
Firstly, we need a data structure to save the user profile information, and another data structure to save the userId's of all users in the application.
Remember the Hash and List Datatype ?
Hash datatype to save user profile information. Take note of the datatype key userItem:${userId}
 await client.hmset(`userItem:${userId}`, "userId", userId, username,
 data.username,firstName, data.firstName, lastName, data.lastName, profilePic, data.profilePic, "timestamp", timestamp)
Then we save the createduserId to a list called users
await client.lpush('users', userId)
If you've noticed, we have to send 2 operations. It's possible to send them one after the other, but that's not optimal.
Upstash supports batch operations, through a feature called pipelining.
So instead of sending single commands and waiting for a response, we can send multiple commands and the response would come back in the same way we sent the commands.
So here's how our operation would look like after using pipelines
 client.pipeline(

        await client.hmset(`userItem:${userId}`, "userId", userId, username, data.username,
            firstName, data.firstName, lastName, data.lastName, profilePic, data.profilePic,
            "timestamp", timestamp),
        await client.lpush('users', userId)
    )
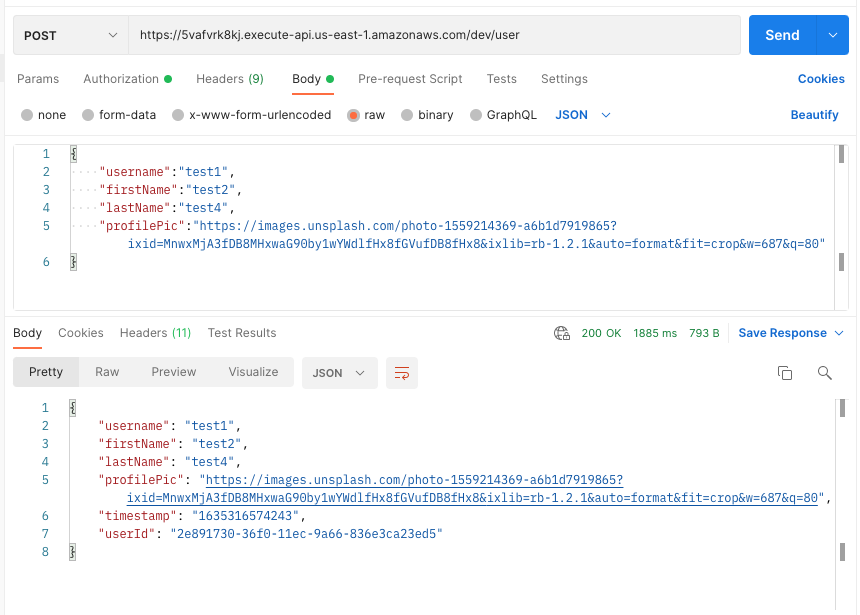
Then we can get all user save profile info and return it as a response through the api-gateway.
   //get and display saved user item
    const userItem = await client.hgetall(`userItem:${userId}`);
Don't forget to update the serverless.yml to reflect this endpoint.
functions:
  createUser:
    handler: user/create.createUser
    events:
      - http:
          path: /user
          method: post
The name of our function is createUser, and it's located in a file called create.js which is inside a folder called user.Hence the handler user/create.createUser.
Take note of the path /user
The createUser function uses the post http method.
Here's the complete code for the users/create.js file
"use strict";
const uuid = require('uuid');
var Redis = require("ioredis");
const username = 'username';
const firstName = 'firstName';
const lastName = 'lastName';
const profilePic = 'profilePic';

if (typeof client === 'undefined') {
    var client = new Redis(process.env.REDIS_CLIENT);
}

/**
 *
 * @param {username,firstName,lastName,profilePic} event
 * @returns
 */
module.exports.createUser = async (event) => {

    const timestamp = new Date().getTime();

    const data = JSON.parse(event.body);
    if (data == null) {
        return {
            statusCode: 400,
            body: JSON.stringify({
                    message: 'Couldn\'t create the user item'

                },
                null,
                2
            ),
        };
    }


    const userId = uuid.v1();
    console.log(`userId is ${userId}`);
    // here, we use a pipeline to perform multiple requests
    // Firstly, we save the user details to a hash dataset with key (`userItem:${userId}`)
    //
    client.pipeline(

        await client.hmset(`userItem:${userId}`, "userId", userId, username, data.username,
            firstName, data.firstName, lastName, data.lastName, profilePic, data.profilePic,
            "timestamp", timestamp),
        await client.lpush('users', userId)
    )

    //get and display saved user item
    const userItem = await client.hgetall(`userItem:${userId}`);

    console.log(userItem);


    return {
        statusCode: 200,
        body: JSON.stringify(
            userItem
        ),

    };
};
Update User
Users would love to update their profiles from time to time. So it's just right we provide a user update endpoint.The only command we need for this operation is the
HMSET command and the userId.
From the Redis documentation, here's exactly how the
HMSET command works.
Sets the specified fields to their respective values in the hash stored at key. This command overwrites any specified fields already existing in the hash.
Here's how the code looks like.
"use strict";
const uuid = require('uuid');
var Redis = require("ioredis");
const username = 'username';
const firstName = 'firstName';
const lastName = 'lastName';


if (typeof client === 'undefined') {
    var client = new Redis(process.env.REDIS_CLIENT);
}

/**
 *
 * @param {username,firstName,lastName,age,profilePic} event
 * @returns
 */
module.exports.updateUser = async (event) => {

    const timestamp = new Date().getTime();
    const userId = event.pathParameters.id;
    const data = JSON.parse(event.body);
    if (userId == null) {
        return {
            statusCode: 400,
            body: JSON.stringify({
                    message: 'Couldn\'t update the user item'

                },
                null,
                2
            ),
        };
    }

    //get


    await client.hmset(`userItem:${userId}`, username, data.username,
        firstName, data.firstName, lastName, data.lastName,
    );

    //get and display saved user item
    const userItem = await client.hgetall(`userItem:${userId}`);

    console.log(userItem);


    return {
        statusCode: 200,
        body: JSON.stringify(
            userItem
        ),

    };
};
Then, in the serverless.yml file, under functions, add...
  updateUser:
    handler: user/update.updateUser
    events:
      - http:
          path: /user/{id}
          method: put
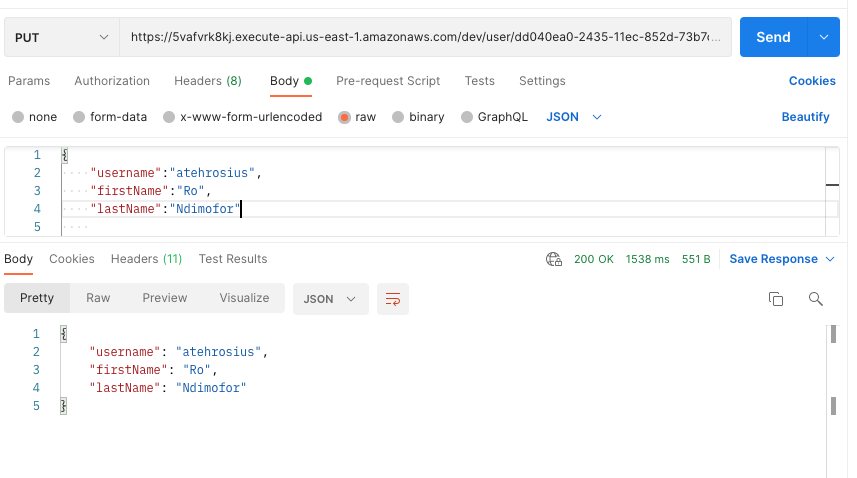
We pass in the userId as a path parameter /user/{id}
Get User
Using theHGETALL command and the hash key, we can get user profile information for a particular user.
Bear in mind that we can also use
HGET command to get user specific information such as firstName or lastName etc.
Let's see the code
Create a file in the
user folder called get.js
"use strict";
var Redis = require("ioredis");


if (typeof client === 'undefined') {
    var client = new Redis(process.env.REDIS_CLIENT);
}


module.exports.getUserById = async (event) => {

    const userId = event.pathParameters.id;

    if (userId == null) {
        return {
            statusCode: 400,
            body: JSON.stringify({
                    message: 'Couldn\'t get the user item'

                },
                null,
                2
            ),
        };
    }

    console.log(`userId is ${userId}`);

    //get and display saved user item
    const userItem = await client.hgetall(`userItem:${userId}`);

    console.log(userItem);


    return {
        statusCode: 200,
        body: JSON.stringify(
            userItem
        ),

    };
};
Then in serverless.yml file,
 getUser:
    handler: user/get.getUserById
    events:
      - http:
          path: /user/{id}
          method: get
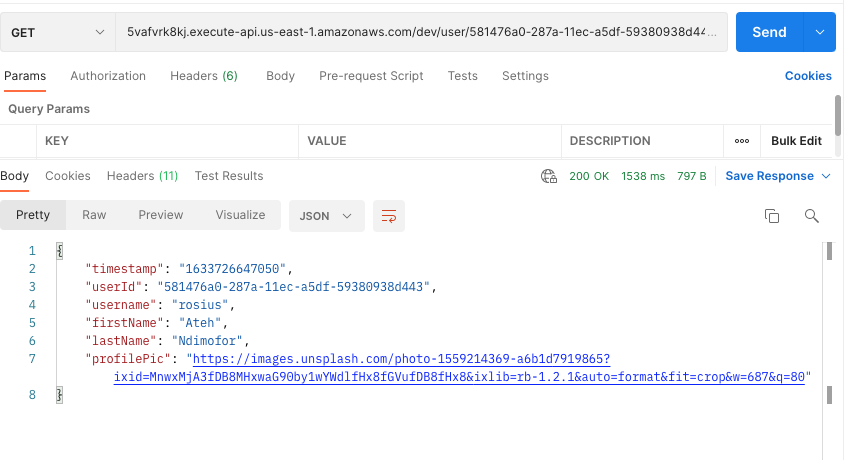
List Users
When we wrote the handler for creating users, remember we left pushed (LPUSH) userId's into a users list.
Now, we have to grab all those id's using the command
LRANGE.
Note: LRANGE is not very efficient if the list of posts start to be very big, and we want to access elements which are in the middle of the list, since Redis Lists are backed by linked lists. If a system is designed for deep pagination of million of items, it is better to resort to Sorted Sets instead.
After getting all userId's, we can then loop through each id and get user profile information using HGETALL.
Let's see how this looks like in code.
"use strict";
var Redis = require("ioredis");


if (typeof client === 'undefined') {
    var client = new Redis(process.env.REDIS_CLIENT);
}


module.exports.getAllUsers = async (event) => {
    let users = [];
    let response = await client.lrange('users', 0, -1);

    async function getAllUsers() {
        let users = [];

        await Promise.all(response.map(async (userId) => {
            const item = await client.hgetall(`userItem:${userId}`);
            users.push(item);
            console.log(users);
        }))

        return users;

    }
    users = await getAllUsers();


    return {
        statusCode: 200,
        body: JSON.stringify(
            users
        ),

    };
};
Then for the serverless.yml
  listUsers:
    handler: user/list.getAllUsers
    events:
      - http:
          path: /users
          method: get
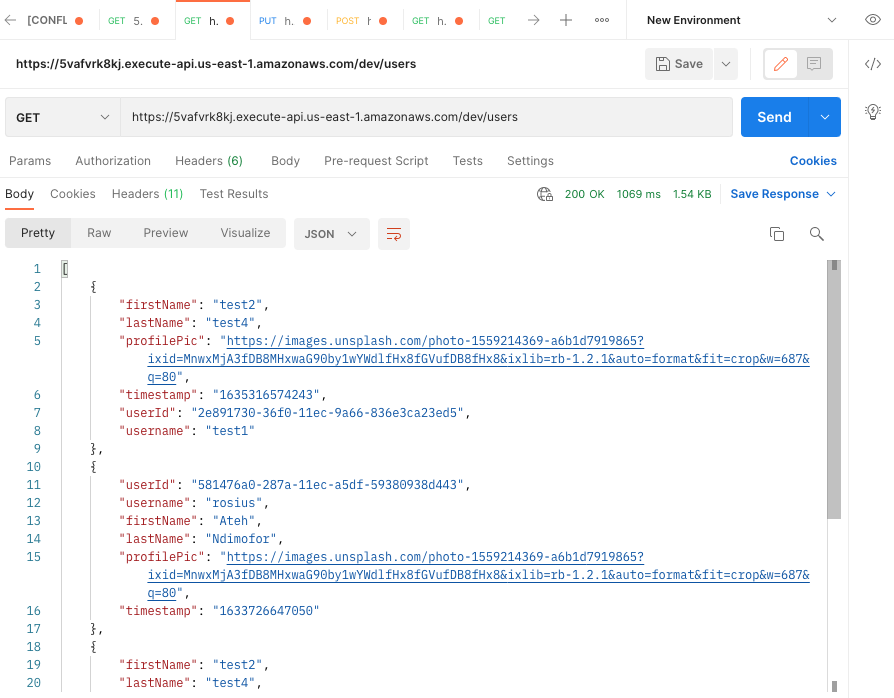
And that's it for users endpoints. You can go ahead and deploy your app, If you haven't done that already.
sls deploy
Post
After a user creates an account, they should be allowed to- Create a Post
- Get a Post by Id
- Get a List of their Posts
- Like or unlike a Post(React to a Post)
Let's get started.
Create a Post
The parameters required to create a post are- userId
- postId(AutoGenerated by UUID)
- postText
- postImage
- createdOn
3 Steps are involved.
1) Use the HMSET command to set post details to a hash Key postItem:${postId}.
2) Use the LPUSH command to add postId to a list of posts.
3) Use the LPUSH command to add postId to a list of userPost:${userId}.
We'll use a pipeline to execute this task chronologically.
Create a file in the post folder called create.js and add the following code to it.
"use strict";
const uuid = require('uuid');
var Redis = require("ioredis");


if (typeof client === 'undefined') {
    var client = new Redis(process.env.REDIS_CLIENT);
}

/**
 *
 * @param {userId,postId,postText,postImage,createdOn} event
 * @returns
 */
module.exports.createPost = async (event) => {

    const timestamp = new Date().getTime();
    const postId = uuid.v1();
    const data = JSON.parse(event.body);
    if (data == null) {
        return {
            statusCode: 400,
            body: JSON.stringify({
                    message: 'Couldn\'t create the Post item'

                },
                null,
                2
            ),
        };
    }

    console.log(`postId is ${postId}`);

    client.pipeline(

        await client.hmset(`postItem:${postId}`,
            "id", postId,
            "userId", data.userId,
            "postText", data.postText,
            "postImage", data.postImage,
            "createdOn", timestamp),
        await client.lpush('posts', postId),
        await client.lpush(`userPost:${data.userId}`, postId)
    )

    //get and display saved post item
    const postItem = await client.hgetall(`postItem:${postId}`);

    console.log(postItem);


    return {
        statusCode: 200,
        body: JSON.stringify(
            postItem
        ),

    };
};
Then, under functions in serverless.yml, add
  createPost:
    handler: post/create.createPost
    events:
      - http:
          path: /post
          method: post
Deploy and test.
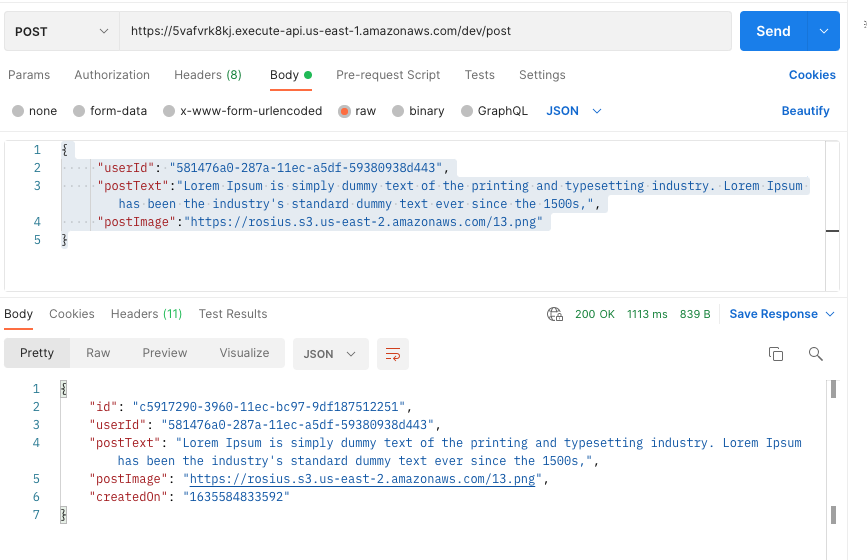
Get Post By Id
When getting the post by Id, we want to get and attach the details of the post admin, alongside the number of reactions(likes) the post has had so far.I know that we haven't looked at liking or unliking a post yet, just hang in there, we're getting to it. Create a file called
get.js in the post folder and save this
"use strict";
var Redis = require("ioredis");


if (typeof client === 'undefined') {
    var client = new Redis(process.env.REDIS_CLIENT);
}


module.exports.getPostById = async (event) => {

    const postId = event.pathParameters.id;
    if (postId == null) {
        return {
            statusCode: 400,
            body: JSON.stringify({
                    message: 'Couldn\'t get the post item'

                },
                null,
                2
            ),
        };
    }

    console.log(`postId is ${postId}`);

    //get and display saved post item
    const postItem = await client.hgetall(`postItem:${postId}`);
    const userItem = await client.hgetall(`userItem:${postItem.userId}`);
    const postReactionsCount = await client.get(`postReactionsCount:${postId}`);
    postItem["postAdmin"] = userItem;
    postItem["reactionCount"] = postReactionsCount == null ? 0 : postReactionsCount;
    console.log(postItem);
    console.log(userItem);


    return {
        statusCode: 200,
        body: JSON.stringify(
            postItem
        ),

    };
};
From the code above, firstly, we get all the post details for a particular post using the hgetall command and the key postItem:${postId}.
Then, since the post object has the userId of the user who made the post(post admin), we use userItem:${postItem.userId} to get the user details for that user.
Remember that this was the exact same key we used in the create user endpoint above.
Thirdly, we get postReactionCount using the get command and a key postReactionsCount:${postId} which we'll use later to save postReactionsCount.
Deploy and test
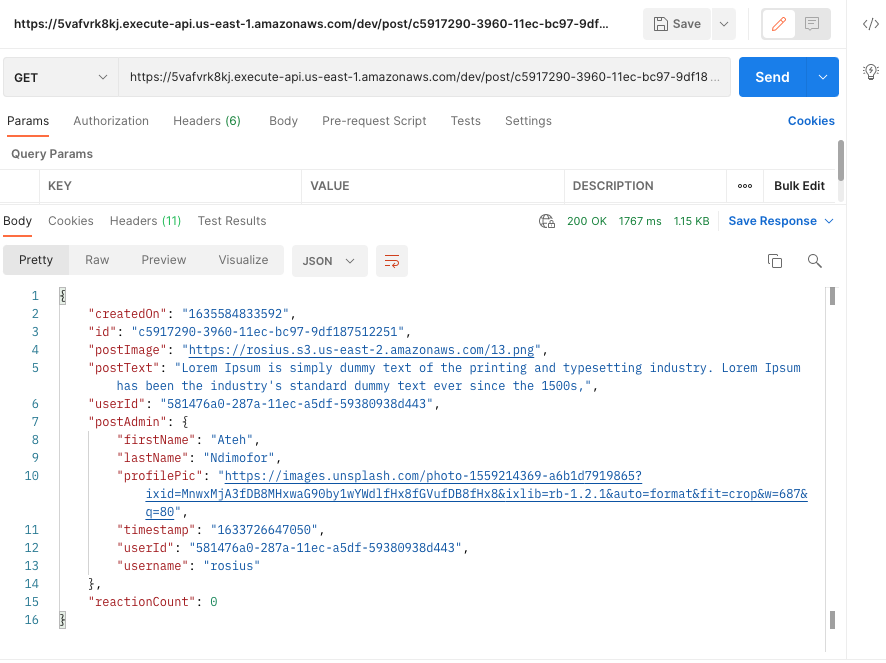
React to a post
This is the most interesting endpoint of the whole application. It was fun to write.A User is allowed to like or unlike a post. Now, when a user clicks on the like button, we first check if this user had liked the post before.
If yes, we, unlike the post. Else, we like the post.
Do you understand?
Just like Instagram or twitter.
Create a file in the post folder called
react_to_post.js
The Endpoint takes
userId and postId as path parameters.
Let's look at a new command. The sorted set. We'll use a sorted set to add userId of the user who's liking the post, and the timestamp when they liked the post.
zadd(`postReactions:${postId}`, timestamp, data.userId)
The key is postReactions:${postId}.
Sorted sets start with Z. From the Redis documentation, zadd
Adds all the specified members with the specified scores to the sorted set stored at key. It is possible to specify multiple score / member pairs. If a specified member is already a member of the sorted set, the score is updated and the element reinserted at the right position to ensure the correct ordering.
Next step is to increment the postReactionsCount:${postId} using theincr` command.
Remember that we used the above key in the get Post by Id endpoint to get post-reaction count.
incr(`postReactionsCount:${postId}`),
Lastly, we save user post reaction details to a Hash
hmset(`userPostReactions:${data.userId}`,
                "postId", postId,
                "userId", data.userId,
                "timestamp", timestamp
            ),
Based on all these, here are the access patterns that are available.
- We can get post reaction count.
- We can get all users who reacted to a post, in ascending or descending order
- We can get all posts a user reacted to.
We mentioned earlier that, we need to do a check to see if a user had previously liked a post. If yes, we unlike that post. Else we like the post
We'll be using the zscore command for this.
Returns the score of member in the sorted set at key. If member does not exist in the sorted set, or key does not exist, nil is returned.
zscore(`postReactions:${postId}`, data.userId)
if zscore is null, then the user hasn't liked it. Else, the user has liked it.
Here's how the complete code looks
"use strict";
const uuid = require('uuid');
var Redis = require("ioredis");


if (typeof client === 'undefined') {
    var client = new Redis(process.env.REDIS_CLIENT);
}

/**
 *
 * @param {userId,postId,postText,postImage,createdOn} event
 * @returns
 */
module.exports.reactToPost = async (event) => {

    const timestamp = new Date().getTime();

    const data = JSON.parse(event.body);
    const postId = event.pathParameters.id;

    if (data == null || postId == null) {
        return {
            statusCode: 400,
            body: JSON.stringify({
                    message: 'Couldn\'t react to the Post'

                },
                null,
                2
            ),
        };
    }

    console.log(`postId is ${postId}`);
    console.log(`userId is ${data.userId}`);
    // first check if user has already liked the post
    const hasUserReacted = await client.zscore(`postReactions:${postId}`, data.userId);
    if (hasUserReacted == null) {
        //user hasn't reacted.
        client.pipeline(
            await client.incr(`postReactionsCount:${postId}`),
            await client.zadd(`postReactions:${postId}`, timestamp, data.userId),
            await client.hmset(`userPostReactions:${data.userId}`,
                "postId", postId,
                "userId", data.userId,
                "timestamp", timestamp
            ),

        )

    } else {
        //user already reacted, so unreact
        client.pipeline(
            await client.decr(`postReactionsCount:${postId}`),
            await client.zrem(`postReactions:${postId}`, data.userId),
            await client.hdel(`userPostReactions:${data.userId}`,
                "postId", postId,
                "userId", data.userId,
                "timestamp", timestamp
            ),

        )

    }


    //return the post reaction count
    const postReactionsCount = await client.get(`postReactionsCount:${postId}`);

    console.log(postReactionsCount);


    return {
        statusCode: 200,
        body: JSON.stringify({
            "postReactionCount": parseInt(postReactionsCount)
        }),

    };
};
Then in serverless.yml
  reactToPosts:
    handler: post/react_to_post.reactToPost
    events:
      - http:
          path: /post/{id}/react
          method: post
Deploy and test.
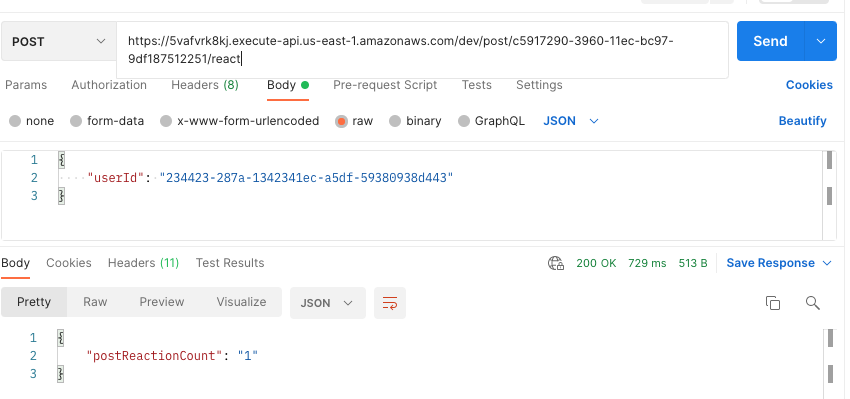
Hit the send button on your API tester(I use PostMan) multiple times and see how the "postReactionCount" toggles between 0 and 1.
Change the UserId and do the check again.
There are a lot of other access patterns and fixes you can add to this API.
How about you take up the challenge to expand on this and learn more.
Here's the link to the complete source code
I absolutely adore the not soo steep learning curve of Redis, and the fact that it allows me to save data the way I'll retrieve it.
Always know your access patterns before you begin developing the app.
I had a lot of fun writing this piece, hope you learned a thing or two.
Did I make a mistake somewhere? A super Sayan like you won't hesitate to let me know.
In the next article, we'll build a Flutter app to consume this API. Stay tuned.
Happy Coding Comrade✌🏿


