Building a social media app with AWS Amplify and Flutter(PART 2)

1 October, 2021 - Loom Recording - Watch Video PART 1
Hi there,
in the first part of this series, we briefly introduced and added amplify to our Flutter application.
In this second part, we'll continue from where we left off.
FULL SOURCE CODE FOR THIS SECTION IS IN THIS BRANCH
Configure Amplify For Flutter
We need to configure and initialize Amplify in our application before running anyamplify related requests.Let's do just that
 Future<void> _initializeApp() async{
    await _configureAmplify();
  }

  final AmplifyDataStore _amplifyDataStore =  AmplifyDataStore(modelProvider: ModelProvider.instance,);
  Future<void> _configureAmplify() async {

   try{


    await Amplify.addPlugins([
     _amplifyDataStore,
      AmplifyAuthCognito(),
      AmplifyAPI(),
      AmplifyStorageS3()
    ]);

      // Once Plugins are added, configure Amplify
      await Amplify.configure(amplifyconfig);

    } catch(e) {
    print('an error occured during amplify configuration: $e');


    }


  }
From the code above, we add the Datastore, Auth,Api and storage plugins, then run Amplify.configure().
Now, call the _initializeApp() function in the initState method of yourmain.dart file.
  @override
  void initState() {

    _initializeApp();
    super.initState();

  }
Here's the full code for the main.dart file main.dart.
In the main.dart file, the homepage is wrapped with a MultiProvider method, gotten from the provider state management plugin we added earlier to the pubspec.yaml file.
We provide the ProfileRepository and SharedPrefUtils.
home: MultiProvider(
          providers: [
            ChangeNotifierProvider(create: (_) => ProfileRepository.instance(),),
            ChangeNotifierProvider(create: (_) => SharedPrefsUtils.instance(),),

          ],
          child: HomePage(),

        )
SharedPrefUtils contains methods to save, get and delete shared preferences from our app. We use it to save and retrieve the userId whenever we need it.
ProfileRepository has methods, getters, and setters for all dependencies we'll need in the profile section of our application.
In the homepage.dart the application retrieves the userId value stored in shared preferences and checks if it has a value or if it's null.
If null, then the user doesn't exist, meaning no user has logged into the app from that device yet. So you get directed to the login screen.
Log In with Google
While setting up the authentication category for Amplify, we choose to have regular username and password signup, alongside google sign up.
And if you followed the link I attached, you must have set up google credentials properly.
Let's take a look at the code for logging in to our app using google.
This code is in the loginRepository.dart file .
 Future<void>googleSignIn(BuildContext context) async{
    googleLoading = true;
    try {
      var res = await Amplify.Auth.signInWithWebUI(provider: AuthProvider.google);


        isSignedIn = res.isSignedIn;
      if(isSignedIn){


        googleLoading = false;
        retrieveCurrentUser().then((AuthUser authUser) async{
          SharedPrefsUtils.instance().saveUserId(authUser.userId).then((value) {
            print("user id saved successfully");
          });
          print("User id is"+authUser.userId);

          List<User> user = await Amplify.DataStore.query(User.classType, where: User.ID.eq(authUser.userId));
          if(user.isNotEmpty){
            Navigator.push(context, MaterialPageRoute(builder: (context){
              // return RegisterScreen();
              //return LoginScreen();

              return ChangeNotifierProvider(create: (_)=>ProfileRepository.instance(),
                child: EditProfileScreen(authUser.userId),);


            }));
          }else{
            Navigator.push(context, MaterialPageRoute(builder: (context){
              // return RegisterScreen();
              //return LoginScreen();

              return ChangeNotifierProvider(create: (_)=>ProfileRepository.instance(),
                child: CreateProfileScreen(),);


            }));
          }


        });


      }else{
        googleLoading = false;
      }

    } on AmplifyException catch (e) {
      print(e.message);
      googleLoading = false;
    }


  }
  Future<AuthUser>retrieveCurrentUser() async{
    AuthUser authUser = await Amplify.Auth.getCurrentUser();
    return authUser;
  }
What this code does is, firstly, it sets a loading indicator value to true. On the loginscreen we'll display or not display a loading indicator when the google sign-in button is clicked, based on this value.
Then we sign in the user with Amplify.Auth.signInWithWebUI.
If successful, we call a method retrieveCurrentUser which retrieves user information like userId, email. We save userId to shared preferences.
Next, we check if a user with the same userId already exists in our datastore. If they do, then they are a returning user. So we navigate to the updateProfileScreen.dart screen.
Else, they are new, so we navigate to createProfileScreen.dart screen.
Please refer to the github repository for the full source code.
Create/Update User Profile
After successfully login in, we get to the create/update profile screen.We want our users to be able to update their profile picture,firstNames, and LastNames.
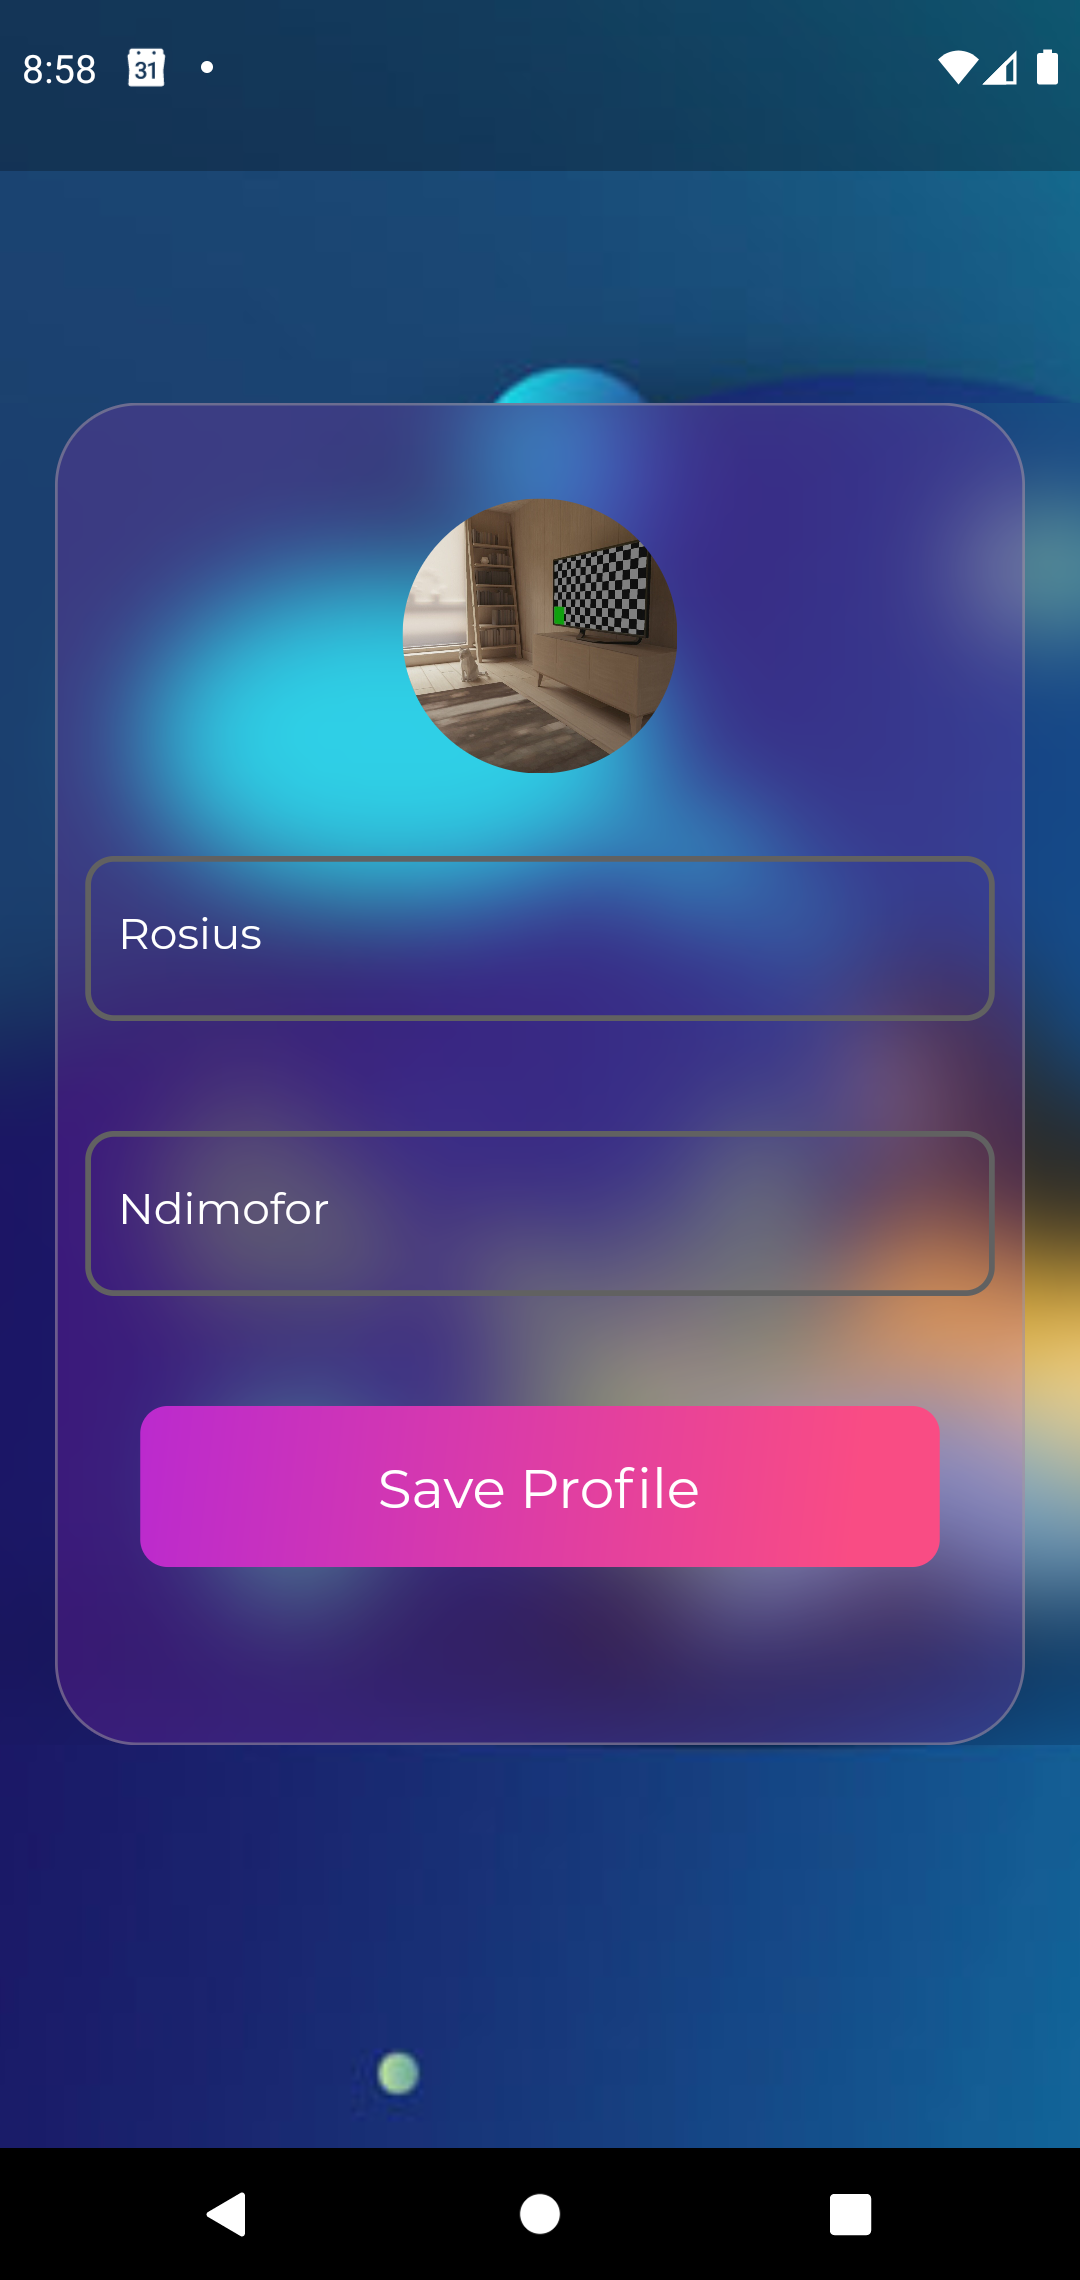
Firstly, we upload the user's profile picture and get its public URL.
We first assign some metadata such as the name and description of the picture to S3UploadFileOptions and also set the accessLevel of the image to StorageAccessLevel.guest.
StorageAccessLevel is an enumeration with values such as guest, private, protected.
Using Amplify.Storage.uploadFile, firstly we pass the key, which is a unique identifier, then the local which is the relative path to the local file, and the options object we created above.S3UploadFileOptions.
We then use await Amplify.Storage.getUrl(key: profilePicKey) to retrieve the URL.
      Map<String, String> metadata = <String, String>{};
      metadata['name'] = "user_$uuid";

      metadata['desc'] = 'A profile picture ';
      S3UploadFileOptions  options = S3UploadFileOptions(accessLevel: StorageAccessLevel.guest, metadata: metadata);
      try {
      UploadFileResult result  =  await Amplify.Storage.uploadFile(
            key: uuid,
            local: croppedFile,
            options: options
        );
      profilePicKey  = result.key;
      print("the key is "+profilePicKey);
      GetUrlResult resultDownload = await Amplify.Storage.getUrl(key: profilePicKey);
      print(resultDownload.url);
      profilePic = resultDownload.url;
      loading = false;

      } on StorageException catch (e) {
        print("error message is" + e.message);
       loading= false;
      }
saveUserProfileDetails
 Future<void>saveUserProfileDetails() async{
  loading = true;
    User newUser = User(
        id:userId,username:username,firstName: firstNamesController.text.trim(),lastName: lastNamesController.text.trim(),
    profilePicUrl: profilePic,email: email,createdOn: TemporalDateTime.now(),isVerified: true);

    await Amplify.DataStore.save(newUser).then((_) => loading = false);


  }
The above function saves userId, username,firstName etc to the datastore.
updateProfileDetails
 Future<void>updateUserProfileDetails(String userId) async{
    loading = true;

    List<User> user = await Amplify.DataStore.query(User.classType, where: User.ID.eq(userId));
    User newUser = user[0].copyWith(id: user[0].id,firstName: firstNamesController.text.trim(),lastName: lastNamesController.text.trim(),
        profilePicUrl: profilePic,updatedOn: TemporalDateTime.now());

    await Amplify.DataStore.save(newUser).then((_) => loading = false);


  }
getUserProfile
Future<User>getUserProfile(String userId) async{

    List<User> user = await Amplify.DataStore.query(User.classType, where: User.ID.eq(userId));
    print(user[0]);

    firstNamesController.text = user[0].firstName;
    lastNamesController.text = user[0].lastName!;
    profilePic =user[0].profilePicUrl!;


    return user[0];


}


}
After user details have been saved properly, we navigate to the HomePage.
FULL SOURCE CODE FOR THIS SECTION IS IN THIS BRANCH
Conclusion
In this post, we configured Amplify in our flutter app and then build the login/ registration and user profile screens.Thanks for reading through.
If you loved it, please leave some feedback in form of a like or comment.
If you find any issue with the post(Maybe a typo or incorrect code), please let me know and I'll get to it immediately.
Till next time ✌🏾
About the author
I love creating and writing about the creation of software.
Comments
Join the discussionBuilding a Social Media App with AWS Amplify and Flutter
This series outlines the steps involved in build an MVP for a social Medial Application using the Amplify Framework and flutter


