Building Full Stack Serverless Application With Amplify, Flutter, GraphQL, AWS CDK, and Typescript(PART 4)

Complete Source Code for the GraphQL CDK API
Complete Source Code for the Flutter App
Here's the Last Article in a 4 part series. We'll continue from where we left off in part 3.
Part 1
Part 2
Part 3
I'm Assuming you already have the following installed and configured on your computer
Create Flutter Project
Create a new Flutter project, name it whatever you like.flutter create notes_app
Add these plugins to your pubspec.yml file
environment:
  sdk: ">=2.12.0 <3.0.0"

dependencies:
  flutter:
    sdk: flutter


  # The following adds the Cupertino Icons font to your application.
  # Use with the CupertinoIcons class for iOS style icons.
  cupertino_icons: ^1.0.2

dev_dependencies:
  flutter_test:
    sdk: flutter
  amplify_flutter: ^0.2.0
  amplify_api: ^0.2.0
  amplify_auth_cognito: ^0.2.0
  flutter_staggered_grid_view: ^0.4.0
  provider: ^5.0.0
  timeago: ^3.1.0
  flutter_svg: ^0.22.0
Install the dependencies by running the following command
flutter pub get
Update target iOS platform
From your project root, navigate to theios/directory and modify the Podfile using a text editor of your choice and update the target iOS platform to 13.0 or higher.
platform :ios, '13.0'
Update target Android SDK version
From your project root, navigate to theandroid/app/ directory and modify build.gradle using a text editor of your choice and update the target Android SDK version to 21 or higher:
minSdkVersion 21
Next, configure Amplify in the root of your projects directory by using
amplify init
After successfully setting up amplify, you can add an auth category using the command
amplify add auth
Setup authentication with username.
Navigate to your project in appsync, and download the configuration file.
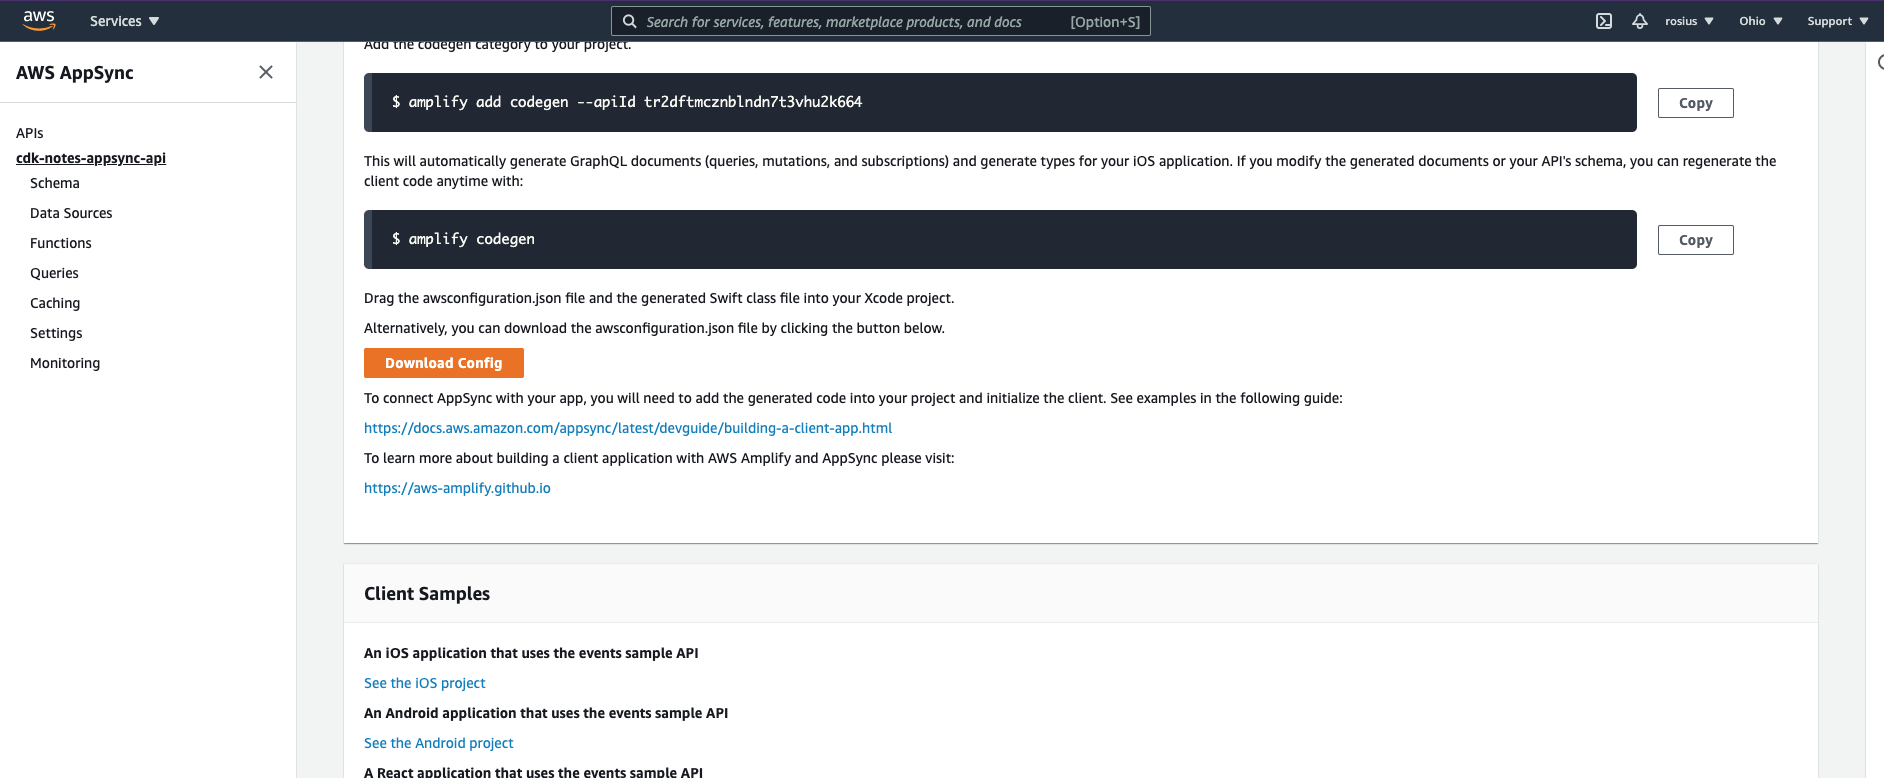 Navigate to
 lib/amplifyconfiguration.dart and add the settings from the config file you downloaded above.
Here's how mine looks like
const amplifyconfig = ''' {
    "UserAgent": "aws-amplify-cli/2.0",
    "Version": "1.0",
    "api": {
        "plugins": {
            "awsAPIPlugin": {
               "cdk-notes-appsync-api_API_KEY": {
                    "endpointType": "GraphQL",
                    "endpoint": "ADD YOUR ENDPOINT HERE",
                    "region": "us-east-2",
                    "authorizationType": "API_KEY",
                    "apiKey": "ADD YOUR API KEY HERE"
                },
                 "cdk-notes-appsync-api_AMAZON_COGNITO_USER_POOLS": {
                    "endpointType": "GraphQL",
                    "endpoint": "endpoint": "ADD YOUR ENDPOINT HERE",
                    "region": "us-east-2",
                    "authorizationType": "AMAZON_COGNITO_USER_POOLS"

                }


            }
        }
    },
    "auth": {
        "plugins": {
            "awsCognitoAuthPlugin": {
                "UserAgent": "aws-amplify-cli/0.1.0",
                "Version": "0.1.0",
                "IdentityManager": {
                    "Default": {}
                },
                "AppSync": {
                    "Default": {
                        "ApiUrl": "endpoint": "ADD YOUR ENDPOINT HERE",
                        "Region": "us-east-2",
                        "AuthMode": "API_KEY",
                        "ApiKey": "da2-2gx4ibbvdrgnvn2nf7aid5nggu",
                        "ClientDatabasePrefix": "cdk-notes-appsync-api_API_KEY"
                    }
                },
                "CredentialsProvider": {
                    "CognitoIdentity": {
                        "Default": {
                            "PoolId": "us-east-2:ad0dbf3f-b8a1-4934-9a2f-c5c0e8d25a29",
                            "Region": "us-east-2"
                        }
                    }
                },
                "CognitoUserPool": {
                    "Default": {
                        "PoolId": "us-east-2_GLX8eEo1l",
                        "AppClientId": "665uc7vb8ac7cincds1m5rgdkj",
                        "Region": "us-east-2"
                    }
                },
                "Auth": {
                    "Default": {
                        "authenticationFlowType": "USER_SRP_AUTH"
                    }
                }
            }
        }
    }
}''';
"cdk-notes-appsync-api_API_KEY". grants public access, while
"cdk-notes-appsync-api_AMAZON_COGNITO_USER_POOLS" grants private access.
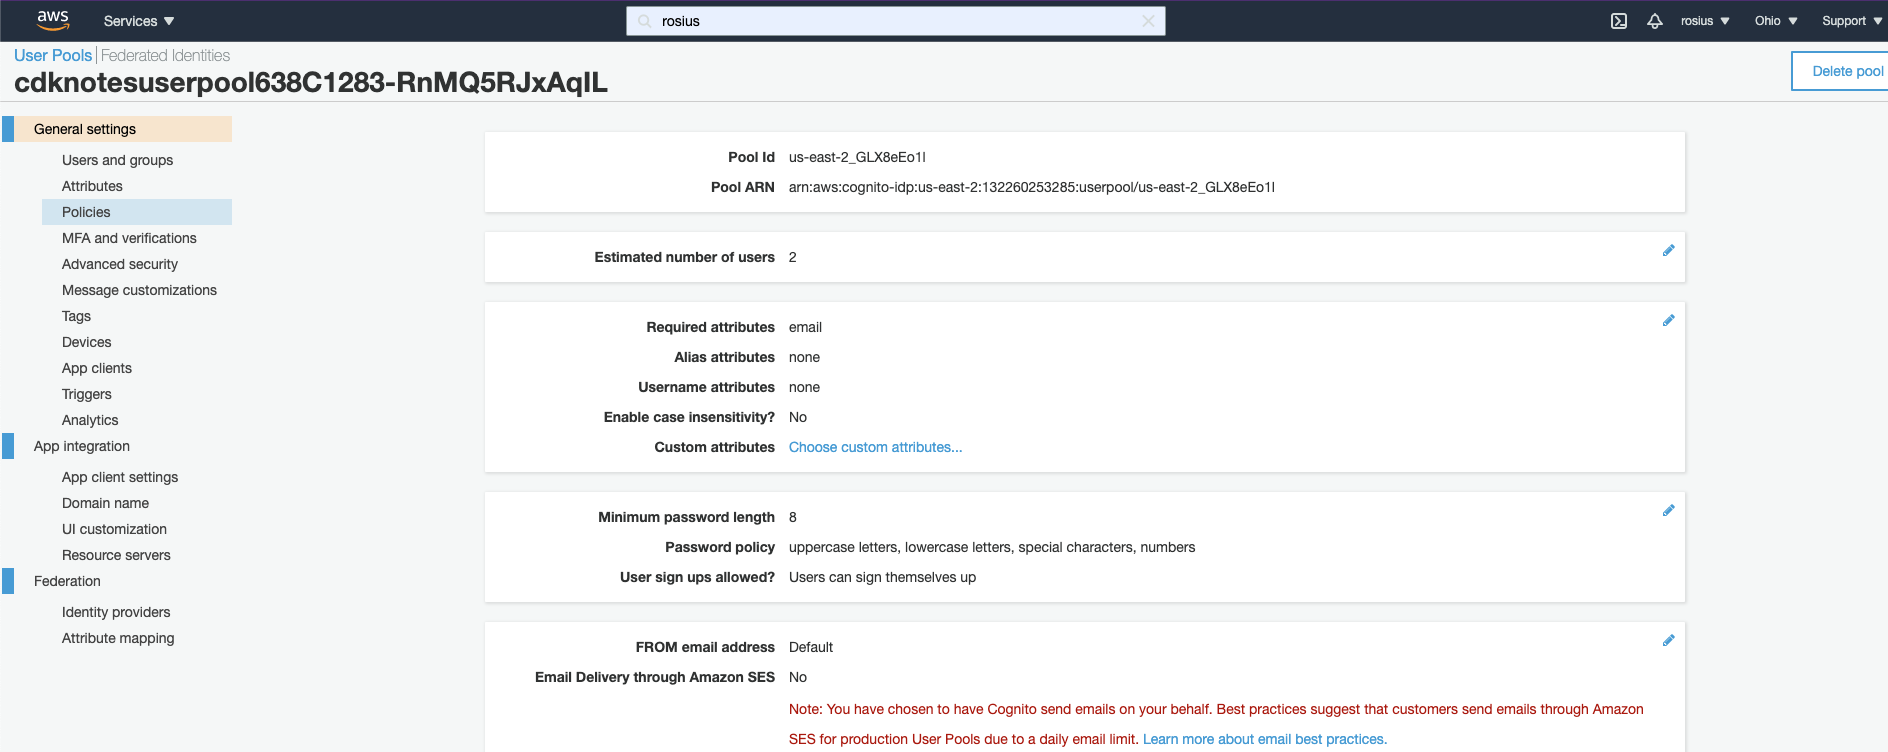
Finally, go to your cdk project in AWS Cognito console and make sure the AppClientId and PoolId in lib/amplifyconfiguration.dart are same as those in Cognito
Configure Amplify In Flutter.
In themain.dart file , let's configure the 2 amplify plugins we would be using
 void _configureAmplify() async {

    // Add Pinpoint and Cognito Plugins, or any other plugins you want to use
    //AmplifyAnalyticsPinpoint analyticsPlugin = AmplifyAnalyticsPinpoint();
    AmplifyAuthCognito authPlugin = AmplifyAuthCognito();

    Amplify.addPlugins([authPlugin,AmplifyAPI()]);

    // Once Plugins are added, configure Amplify
    // Note: Amplify can only be configured once.
    try {
      await Amplify.configure(amplifyconfig);


    } on AmplifyAlreadyConfiguredException {
      print("Tried to reconfigure Amplify; this can occur when your app restarts on Android.");
    }
  }
What happens above is, we add the auth and api plugins to Amplify and configure them alongside the config file we edited.
  Amplify.addPlugins([authPlugin,AmplifyAPI()]);
  await Amplify.configure(amplifyconfig);
Then we can call this function in the initState.
 @override
  void initState() {
    // TODO: implement initState
    super.initState();
  _configureAmplify();
  }
So every time your app runs, amplify is configured first before any requests are being made.
In the next section, we'll look at code snippets of each function our application is going to have.
Let's get started, shall we
Registration And Login
In order for a user to have authenticated access to the private endpoints, they have to be able to create and verify their account.In flutter, we'll create a form to retrieve their username, email and password, then using Amplify, we'll send those to Cognito for validation and registration.
Upon successful registration, a verification code(OTP)(One Time Password) would be sent to the user's email, which they'll need to enter it into the app to complete account verification.
registration
 Map<String, String> userAttributes = {
        'email': emailController.text.trim(),
        'phone_number': '+15559101234',
        // additional attributes as needed
      };
      SignUpResult res = await Amplify.Auth.signUp(
          username: usernameController.text.trim(),
          password: passwordController.text.trim(),
          options: CognitoSignUpOptions(
              userAttributes: userAttributes
          )
      );
verify account with OTP code
  SignUpResult res = await Amplify.Auth.confirmSignUp(
          username: username,
          confirmationCode: codeController.text.trim());
Login
 SignInResult signInRes = await Amplify.Auth.signIn(
            username: username,
            password: password,
          );
The complete code is available here, in the reg_login_repo.dart file.
List All Notes
The home page of our application would have a staggered gridview of all Notes in our database. Here's the code to grab all notes using graphQL and Amplify
    String graphQLDocument =
    '''query listNotes {
  listNotes {
    color
    description
    id
    title
    createdOn
  }
}''';

    var operation = Amplify.API.query(


        request: GraphQLRequest<String>(document: graphQLDocument,apiName: "cdk-notes-appsync-api_API_KEY"));


    var response = await operation.response;

    final responseJson = json.decode(response.data);
 print("here"+ responseJson.toString());
Take note of the apiName: "cdk-notes-appsync-api_API_KEY which makes the endpoint publicly accessible.
Create Note
This screen should only be accessed by authenticated users. String graphQLDocument =
'''mutation note(\$id: ID!,\$title:String!, \$description: String!,\$color:String!,\$createdOn:AWSTimestamp) {
createNote(note:
{
id: \$id,
title:\$title,
description:\$description,
color:\$color,
createdOn:\$createdOn
}) {
id
title
description
color
}
}''';
var operation = Amplify.API.mutate(
request: GraphQLRequest<String>(
document: graphQLDocument,
apiName: "cdk-notes-appsync-api_AMAZON_COGNITO_USER_POOLS",
variables: {
'id': uuid,
'title': noteTitleController.text,
'description': noteDescriptionController.text,
'color': colorSelected,
'createdOn': dateCreated.microsecondsSinceEpoch,
},
));
var response = await operation.response;
var data = response.data;
print('Mutation result is' + data);
print('Mutation error: ' + response.errors.toString());
Take note of the Amplify.API.mutate which shows that we are about to perform a mutation. Also pay attention to the apiName: "cdk-notes-appsync-api_AMAZON_COGNITO_USER_POOLS", which makes this API endpoint accessible to authenticated users only.
As an exercise, please implement the remaining endpoint such as
- getNoteById
- updateNote
- deleteNote I'll love to see how you do it.
Conclusion
In this tutorial series, we looked at how to build a full-stack serverless application by leveraging the powerful capabilities of frameworks,languages and tools such- GraphQl
- Typescript
- AWS CDK
- Amplify
- Flutter
If you found this piece helpful, please share it with your peers.
Show a Serverless Hero Some ❤️ by spreading the word.
Hope you learned something new, I'll be coming through with a ton of stuff. So stay tuned.
Happy Coding ✌🏿

About the author
I love creating and writing about the creation of software.
Comments
Join the discussionthis my Appsync GraphQL schema :
type NotesContent { title: String subtitle: String content: String imageUrl: String }
type notes @model @auth(rules: [{ allow: private }]) { id: ID! note: NotesContent! }
I don't know how to do the mutations in flutter. i am trying to the mutation getting the error. please can any one help me out about mutations and getting the list. i saw this post is very nice.
Gold Material Mate!
Thanks a lot, Shah.🙏🏾. Glad you enjoyed it
Authenticated Full Stack Application with Flutter, AWS CDK and Typescript
In this blog series, we'll walk through creating an authenticated GraphQl API with AWS CDK and Typescript, then consuming that API with a beautiful Flutter Mobile Application


