Building Serverless Applications with Amplify,VueJs/NuxtJs, and GraphQL(Part 2)

I love creating and writing about the creation of software.
Introduction
In Part 1 of this article, we looked at the use cases and data access patterns for our application. We also looked at the GraphQL schema and explained line by line, why it was written that way.In this second part, we will start building the application. But before we begin, make sure you have the following installed
Sign up for an AWS account
If you don’t already have an AWS account, you’ll need to create one in order to follow the steps outlined in this tutorial.Create an AWS Account.
Install and configure the Amplify CLI
The Amplify Command Line Interface (CLI) is a unified toolchain to create AWS cloud services for your app. Let’s go ahead and install the Amplify CLI.npm install -g @aws-amplify/cli
When it's done installing, setup the Amplify CLI by running
amplify configure
You'll be asked to sign in to your AWS account and create a user with AdministrativeAccess to your account to provision AWS resources for you like AppSync, Cognito etc.. Just follow the instructions in the CLI to complete it.
Once the user is created, Amplify CLI will ask you to provide the accessKeyId and the secretAccessKey to connect Amplify CLI with your newly created IAM user.
Enter the access key of the newly created user:
? accessKeyId:  # YOUR_ACCESS_KEY_ID
? secretAccessKey:  # YOUR_SECRET_ACCESS_KEY
This would update/create the AWS Profile in your local machine
? Profile Name:  # (default)

Successfully set up the new user.
Create Nuxt app
Let's create a nuxt app. I'll be using yarn as my package manager.yarn create nuxt-app socially-app
Follow the instructions in the CLI to create your Nuxt App. Once done, open up the app in your favourite IDE. I use vscode.
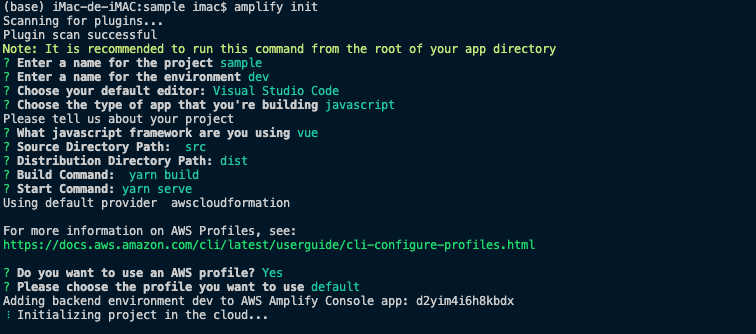
From the command line, navigate to the projects root directory and initialize amplify using the command
amplify init
Follow the instructions on the CLI to complete the setup. Here's a screenshot of the choices I made.
Add Amplify.js
Create a file called amplify.js in the plugins folder and type in this code// plugins/amplify.js
import Amplify from 'aws-amplify'
import '@aws-amplify/ui-vue';
import config from '../src/aws-exports'
Amplify.configure(config)
Then open up the nuxt.config.js file and add this line of code inside plugins
{ src: '~/plugins/amplify.js', mode: 'client' }
So plugins in next.config.js should look like this
 plugins: [
    { src: '~/plugins/amplify.js', mode: 'client' }
  ],
This enables our application to initialize amplify before starting.
Add Authentication
The first step in creating our application is to add authentication. A user should be able to identify who they are, before accessing the app.(From the Docs) The Amplify Framework uses Amazon Cognito as the main authentication provider. Amazon Cognito is a robust user directory service that handles user registration, authentication, account recovery & other operations.
We would add username and password authentication.
amplify add auth
? Do you want to use the default authentication and security configuration? Default configuration
? How do you want users to be able to sign in? Username
? Do you want to configure advanced settings?  No, I am done.
Deploy the service using
amplify push
Login Screen
The authentication service has been added to AWS. It's now time to add authentication to our Nuxt App.We'll be leveraging the strengths of the authentication UI component offered by the Amplify library to quickly create a login/Sign up/forgot password and enter OTP screen flow. Configurations for the authentication UI component are in the aws-exports.js file.
Create a file in the pages folder called login.vue and type in the following code
<template>
  <div>

    <amplify-authenticator v-if="authState !== 'signedin'" class="signIn" />
    <div v-if="authState === 'signedin' && user">
         <span>{{user.username}}</span>
        <span>{{user.attributes.email}}</span>
     <button v-on:click="signOut">Sign Out</button>
    </div>
  </div>
</template>

<script>
import { onAuthUIStateChange } from '@aws-amplify/ui-components'
import { Auth }  from 'aws-amplify';


export default {

  created() {
    onAuthUIStateChange((authState, authData) => {
      this.authState = authState;
      this.user = authData;
      console.log(this.user);
    })
  },
  data() {
    return { user: undefined, authState: undefined }
  },
  methods: {
    signOut: async () => Auth.signOut()
  },
  beforeDestroy() {
    return onAuthUIStateChange;
  }
}
</script>

<style>


:root {
  --amplify-primary-color: #4287f5;
  --amplify-primary-tint: #005cf0;
  --amplify-primary-shade: #005cf0;
}
</style>
We use the amplify-authenticator to quickly create a login and signup screen. Once the user logs in successfully, we grab the authentication state, save user details into a user object and display the user's name and email with a login button.
In your index folder, type in this code
<template>
  <div>
    <login/>
  </div>
</template>

<script>
import login from './login.vue'
export default {
  components: { login },}
</script>

<style>

</style>
I'll run the app using yarn dev and here's my output
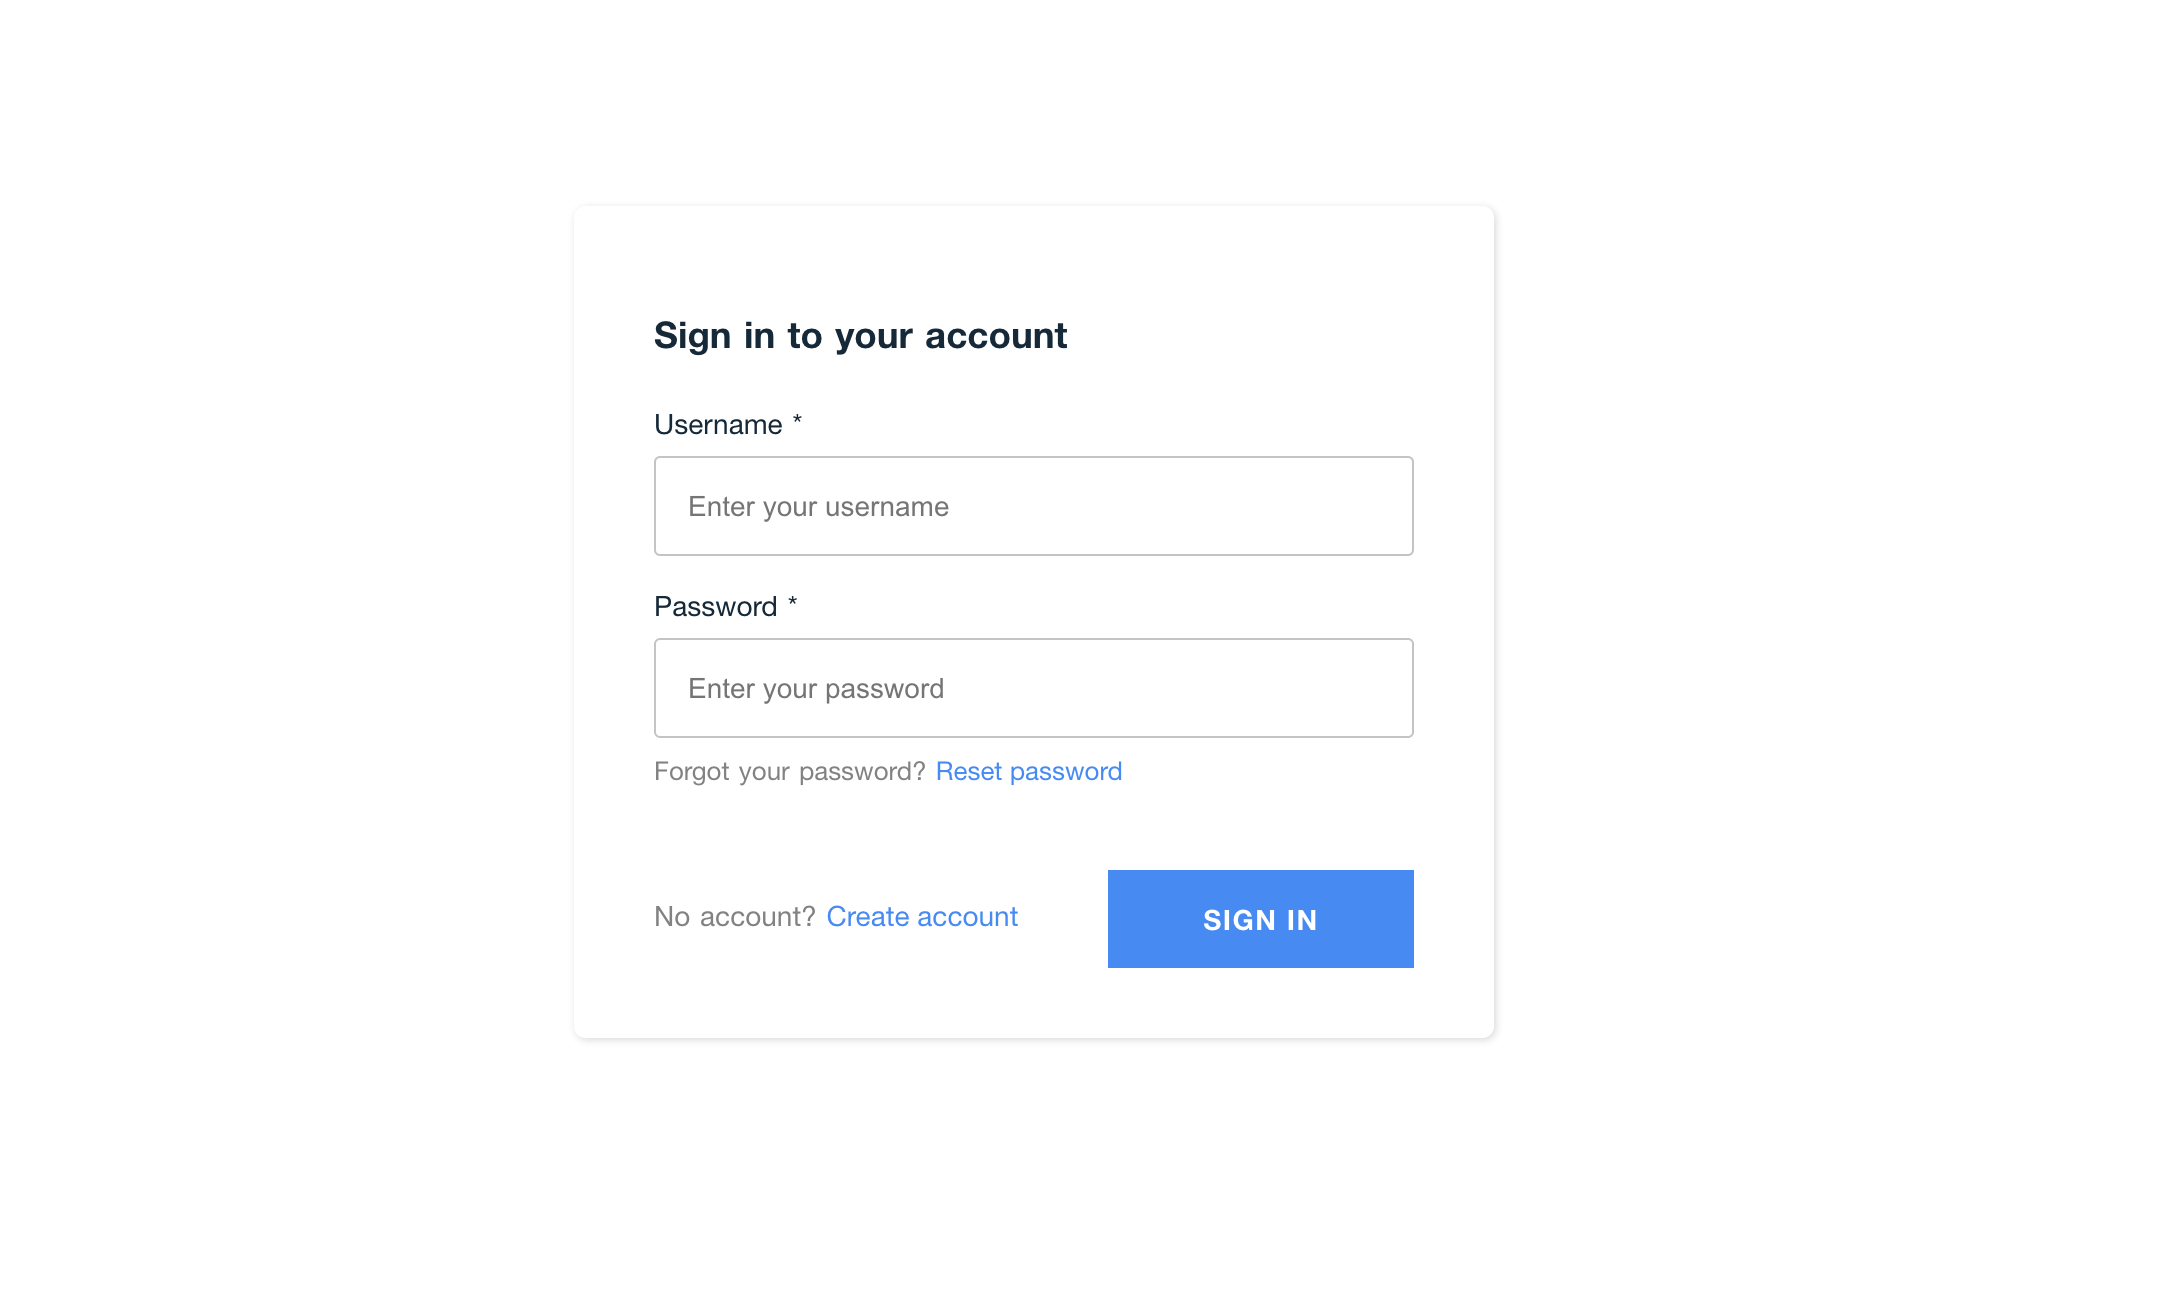
Everything from login to sign up to reset password has already been set up for you. You can go ahead and follow this link to customize your login screen further.
Now, let's create our Graphql API, which would enable us to save user, post, and comment information to DynamoDb.
Add GraphQl API
We already have a schema we created with GraphQl transform in part 1 of this post series.
type User @model
@key(name:"byEmail",fields:["email"],queryField:"getUserByEmail")

@auth(rules:[
    { allow: owner },
      { allow: private, operations: [read] }


]) {
  id: ID!
  username: String!
  email:String!
  profilePicUrl:String!
  posts: [Post] @connection
}
type Post @model

@auth(rules:[
    { allow: owner },
      { allow: private, operations: [read] }


])
{
  id: ID!
  userID:ID!
  postText: String!
  postImageUrl:String!
  status:Status!

  user: User @connection(fields:["userID"])
  comments: [Comment]
}
type Comment @model
@auth(rules:[
    { allow: owner },
      { allow: private, operations: [read] }


]) {
  id: ID!
  commentText: String!
  postID:ID!
  userID:ID!
  post: Post @connection(fields:["postID"])
  user:User @connection(fields:["userID"])
}

enum Status {
  CREATED
  UPDATED
  DELETED
}
Create GraphQL API and database
Let's use the modeled data above to create the GraphQL API.
From the root of the project, run the following command:
amplify add api
Here are the choices I made
(base) iMac-de-iMAC:sample imac$ amplify add api
? Please select from one of the below mentioned services: GraphQL
? Provide API name: socially
? Choose the default authorization type for the API Amazon Cognito User Pool
Use a Cognito user pool configured as a part of this project.
? Do you want to configure advanced settings for the GraphQL API No, I am done.
? Do you have an annotated GraphQL schema? No
? Choose a schema template: One-to-many relationship (e.g., “Blogs” with “Posts” and “Comments”)

The following types do not have '@auth' enabled. Consider using @auth with @model
         - Blog
         - Post
         - Comment
Learn more about @auth here: https://docs.amplify.aws/cli/graphql-transformer/directives#auth


GraphQL schema compiled successfully.
Immediately after this, let's navigate to the folder amplify/backend/api/socially and edit the generated schema.graphql file.
Copy the model we have above and replace the content of this file with it.
Save the file and run
amplify push
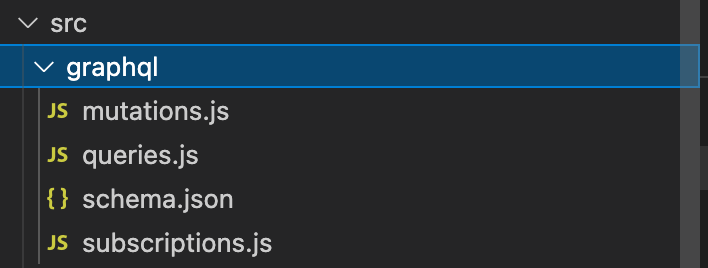
Once your API was been successfully created, you'll find generated mutations.js,queries.js, and subscription.js files in a graphQl folder in your src directory.
Add Storage
Based on our data access pattern, users should be able to upload a profile picture and also upload a post Image when creating a post. So it's just right we add an AWS s3 mechanism to handle the whole process for us.
From the root of the project, run the below command to create a storage bucket for your application.
amplify add storage
Select content in prompted options
? Please select from one of the below mentioned services (Use arrow keys)
❯ Content (Images, audio, video, etc.)
  NoSQL Database
The CLI will walk you through the options to name your S3 bucket. To update your backend run:
amplify push
Conclusion
In this post, we saw how to
- Install and Configure Amplify in your application
- Add Amplify categories such as auth, api and storage
- Added and tested the login page for our application.
We'll continue developing the app in the next post, so stay tuned. If you found this post helpful, please leave feedback.
Happy Codding ✌🏿