Building Serverless Applications with Amplify, VueJs/NuxtJs, and GraphQL(Part 3)

I love creating and writing about the creation of software.
Welcome to part 3 of this post series.
In Part 1 of this post series, we looked at the use cases and data access patterns for our application. We also looked at the GraphQL schema and explained line by line, why it was written that way.
In Part 2, we installed and configured amplify.
Added auth , api and storage Categories.
Built a login page by leveraging the authentication UI component offered by the Amplify Framework, which provides, login,signup, account verification, reset password, and a lot more other use cases out of the box.
Let's continue from where we left off in part 2.
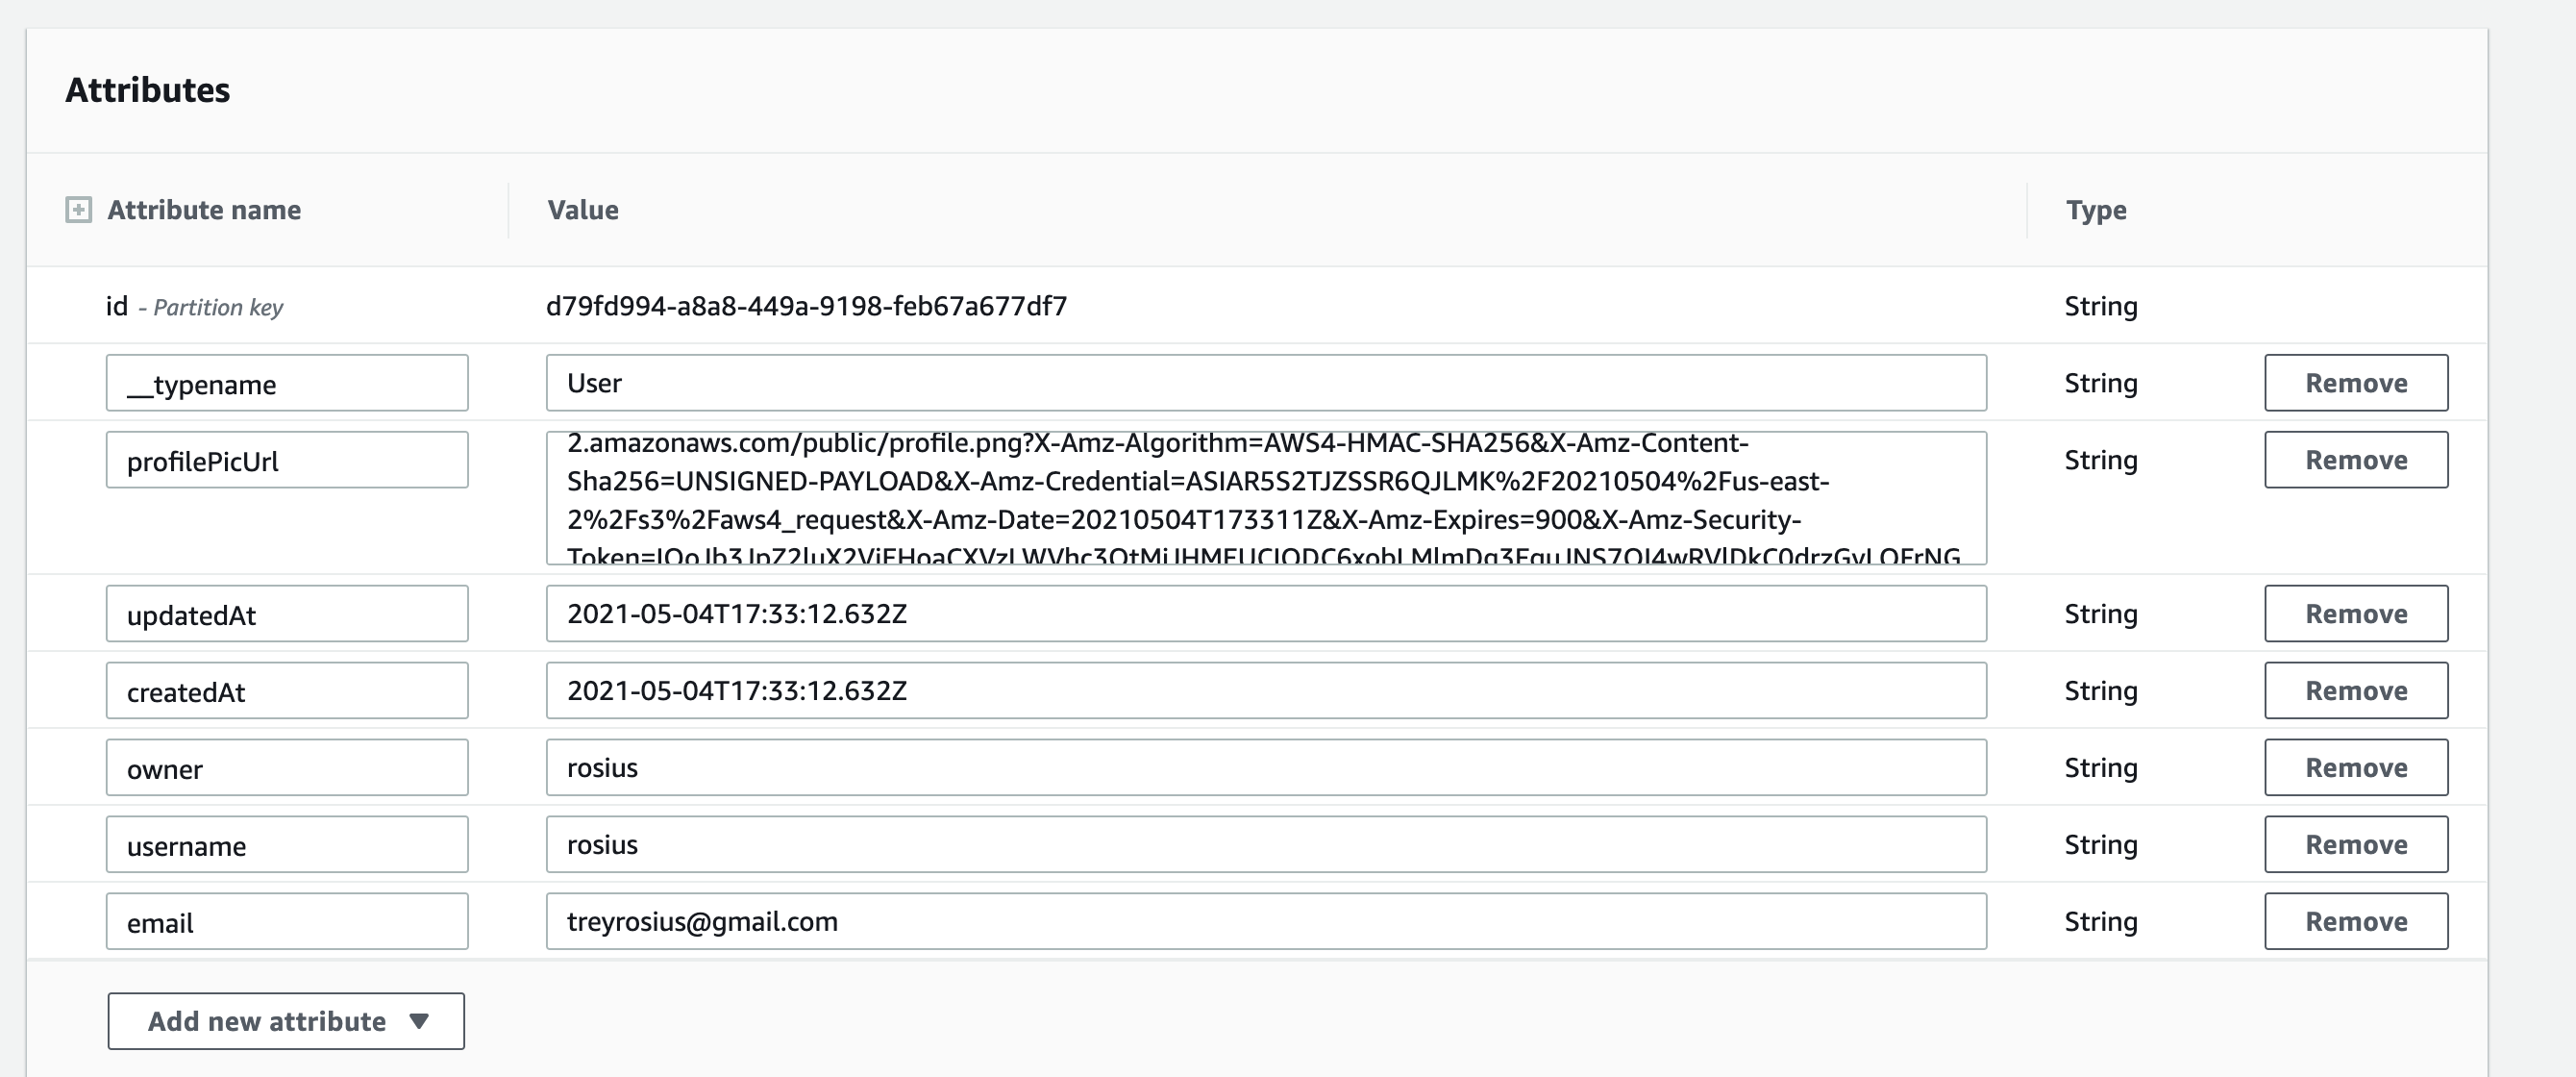
Let's add an update screen, which would give us access to upload a profile picture. After a user successfully uploads a profile picture, we'll get the presigned URL, combined with username and email, and save it to the User table in DynamoDB.
Create a file named UpdateProfile.vue in the components directory and type in this code
<template>
    <div class="update-profile">

        <div class="name">Socially</div>

    <div class="content">
 <input type="file" @change="onFileChange" />

      <div id="preview">
    <img class= "profilepic" v-if="url" :src="url" />
  </div>


        <input type="submit" value="Upload Image" class="btn" @click="upload">


      </div>
   </div>
</template>

<script>
import { API } from 'aws-amplify';
import { Storage }  from 'aws-amplify';
import { v4 as uuidv4 } from 'uuid';
import profile_icon from '@/assets/profile.png';

import {createUser} from '../src/graphql/mutations';
    export default {
        mounted(){
            this.first_name = this.username;
            this.email = this.email;
            console.log(this.email);

        },

       props:{
           username:String,
           email:String

       },
       data(){
           return{
               first_name:String,
           url:profile_icon,
           filename:String,
           filePath:String

           }

       },
       methods:{


 async addUserToDb(){
                const uuid = uuidv4();
               const {username,email,filename} = this;
               const signedURL = await Storage.get(filename);
               const user = {id:uuid,username,email,profilePicUrl:signedURL};

               console.log("signed url"+signedURL);
               await API.graphql({
                   query:createUser,
                   variables:{input:user},
               }).then((result) =>{
                   console.log("result is"+result);
               })
               console.log("successfully uploaded");
               this.$router.push({name:'home',params:{id: uuid}});
           },

           onFileChange(e) {
      const file = e.target.files[0];
      console.log(file);
      this.filename =file.name;
      this.filePath = file;

      this.url = URL.createObjectURL(file);
    },
    upload(e) {
        console.log(this.filename);
       const result = Storage.put(this.filename, this.filePath, {

           contentType:this.filePath.type,
    progressCallback(progress) {

        console.log(`Uploaded: ${progress.loaded}/${progress.total}`);
  },
}).then((result) =>{

    this.addUserToDb();
})
    }


       }

    }
</script>

<style lang="scss" scoped>
.name{
    background-image: linear-gradient(120deg, var(--color-grad-1) 0%, var(--color-grad-2) 100%);
    font-family: var(--app-name-font);
    font-size: 60px;
    margin-top: 20px;
    height: 100px;

    font-weight: bold;


    -webkit-background-clip: text;
    background-clip: text;
    -webkit-text-fill-color: transparent;
}
.update-profile{
    display: flex;
    flex-direction: column;
    justify-content: center;
    align-items: center;
}
.content{
    margin-top: 10px;

}
input[type="file"]{
    margin-top: 20px;
    margin-bottom: 20px;
}

</style>
Firstly, we create a form to enable the user to pick and preview an image.
<div id="preview">
    <img class= "profilepic" v-if="url" :src="url" />
  </div>
When the user hits the upload image button, the upload(e) method is called which uploads the image to the s3 bucket using Storage.put("filename,"filesource") method.
When it's done uploading, we call the addUserToDb() which grabs the pre-signed Url of the uploaded image, combines it with the username and email, and then saves it to our User table in DynamoDB through the GraphQL API. Then moves to a new page called home. The username and email are being passed in as props.
await API.graphql({
                   query:createUser,
                   variables:{input:user},
               })
Remember that the createUser GraphQl method was autogenerated in the mutations file.
import {createUser} from '../src/graphql/mutations';
Update your login.vue page to look like this now.
 <div v-if="authState === 'signedin' && user">

       <update-profile :email="user.attributes.email" :username="user.username"></update-profile>
     <button v-on:click="signOut">Sign Out</button>
    </div>
There are a couple of adjustments we need to make before testing our application.
Firstly, create a file in the pages directory called home.vue and type in the following code.
<template>
    <div>
      <span>Home page</span>
    </div>
</template>

<script>
    export default {

    }
</script>

<style lang="scss" scoped>

</style>
Secondly, add these dependencies to your package.json file. After adding them, install using yarn install or npm install
"node-sass": "^4.13.1",
 "normalize.css": "^8.0.1",
 "sass-loader": "^7.1.0",
 "uuid": "^8.3.2"
Once done, create a file called main.scss in your assets directory and add this code to it. It's the main style of our app.
@import url('https://fonts.googleapis.com/css2?family=Montserrat&display=swap');
@import url('https://fonts.googleapis.com/css2?family=Lobster&display=swap');
:root{
    --app-background: #eaebf5;
    --chat-background: #fff;
    --link-color: #c0c1c5;
    --navigation-bg: #fff;
    --navigation-box-shadow: 0 2px 6px 0 rgba(136, 148, 171, 0.2), 0 24px 20px -24px rgba(71, 82, 107, 0.1);
    --main-color: #3d42df;
    --message-bg: #f3f4f9;
    --message-bg-2: #3d42df;
    --message-text: #2c303a;
    --placeholder-text: #a2a4bc;
    --button-bg: #fff;
    --theme-bg: #1f1d2b;
    --font-family:'Montserrat', sans-serif;
    --app-name-font:'Lobster', cursive;
    --shadow-dark: 0 2rem 6rem rgba(0,0,0,.3);

    --color-grey-light-3: #d3c7c3; // Light text (placeholder)
    --color-grey-dark-1: #615551; // Normal text
    --color-grad-1: #fccb90;
    --color-grad-2: #d57eeb;
     --gradient: linear-gradient(to right bottom, var(--color-grad-1), var(--color-grad-2));

}

* {
    box-sizing: border-box;
  }
  html, body {
    width: 100%;
    height: 100%;
    margin: 0;
    padding: 0;
    overflow: hidden;


    font-family: var(--font-family);
  }

  button {
    outline : none;
    transition: .2s;
    cursor: pointer;

    &:hover {
      opacity: .7;
    }
  }
  a { text-decoration: none; }

  .app-container {
    background-color: var(--app-background);
    width: 100%;
    height: 100%;
    display: flex;
    transition: .2s;
  }
  .left-side {
    position: fixed;
    padding: 16px;
    flex-basis: 120px;
    display: flex;
    flex-direction: column;
    align-items: center;
    justify-content: center;
    height: 100%;
  }
  .right-side{
      display: flex;
      flex-grow: 1;


      height: 100%;
      flex-direction: column;

  }

  .header {
    display: flex;
    position: fixed;
    background-color: var(--app-background);

    height: 100px;
    width: 100%;


    align-items: center;
    justify-content: space-around;


    flex-shrink: 0;
    flex-grow: 1;
    padding: 30px;


   }
   .main-content{
    display: flex;
    flex-wrap: wrap;

    margin-top: 5%;

    overflow-y: scroll;
    @media screen and (max-width: 1600px) {
        margin-top: 10%;
        margin-left: 10%;
       }
    @media screen and (max-width: 575px) {
        margin-top: 20%;
        margin-left: 10%;
       }
       @media screen and (max-width: 400px) {
        margin-top: 25%;
        margin-left: 10%;
      }
}

%btn {
    background-image: var(--gradient);
    border-radius: 10rem;
    border: none;
    text-transform: uppercase;
    color: #fff;
    cursor: pointer;
    display: flex;
    align-items: center;
    transition: all 0.2s;

    &:hover {
      transform: scale(1.05);
    }

    &:focus {
      outline: none;
    }

    & > *:first-child {
      margin-right: 1rem;
    }
  }

  .btn {
    @extend %btn;

    padding: 1.2rem 4rem;
    font-size: 1.5rem;
    font-weight: 600;

    svg {
      height: 2.25rem;
      width: 2.25rem;
      fill: currentColor;
    }
  }

.navigation {
    display: flex;
    flex-direction: column;
    background-color: var(--navigation-bg);
    padding: 24px;
    border-radius: 10px;
    box-shadow: var(--navigation-box-shadow);
  }

  .nav-link + .nav-link {
    margin-top: 32px;
  }

  .nav-link:hover svg {
    color: #3d42df;
  }

  .icon svg {
    width: 24px;
    height: 24px;
    color: var(--link-color);
    transition: .2s ease-in;
  }


.app-name{
    background-image: linear-gradient(120deg, var(--color-grad-1) 0%, var(--color-grad-2) 100%);
    font-family: var(--app-name-font);
    font-size: 50px;

    -webkit-background-clip: text;
    background-clip: text;
    -webkit-text-fill-color: transparent;

    @media screen and (max-width: 1200px) {
        display: none;
       }
       @media screen and (max-width: 1100px) {
         display: inline;
       }
}

.user {
 &-settings {
  display: flex;
  align-items: center;
  padding-left: 20px;
  flex-shrink: 0;

  svg {
   width: 10px;
   flex-shrink: 0;
   @media screen and (max-width: 575px) {
    display: none;
   }
  }
  .notify {
   position: relative;
   svg {
    width: 20px;
    margin-left: 24px;
    flex-shrink: 0;
   }
   .notification {
    width: 8px;
    height: 8px;
    border-radius: 50%;
    background-color: #ec5252;
    position: absolute;
    right: 1px;
    border: 1px solid var(--theme-bg);
    top: -2px;
    @media screen and (max-width: 575px) {
     display: none;
    }
   }
  }
 }
 &-img {
  width: 50px;
  height: 50px;
  border-width: 2px;
  border-color: #d57eeb;
  padding: 5px;
  border-style: solid;
  flex-shrink: 0;
  object-fit: cover;
  border-radius: 50%;
 }
 &-name {

  font-size: 17px;
  margin: 0 6px 0 12px;

 }
}

.post{

   position: relative;
   margin: 10px 10px;

}

.name-tag {
    position: absolute;
    bottom: 12px;
    right: 12px;
    font-size: 12px;
    color: #fff;
    background-color: rgba(0,15,47,0.5);
    border-radius: 4px;
    padding: 4px 12px;
  }
.img{
    border-radius: 10px;
    object-fit: cover;
    width: 300px;
    height: 300px;
    @media screen and (max-width: 400px) {
        width: 200px;
        height: 200px;
      }

}
.author {

    &-img {
     width: 52px;
     height: 52px;
     border: 1px solid white;
     padding: 4px;
     border-radius: 50%;
     object-fit: cover;
     &__wrapper {
      bottom: 0;
      margin: 10px 10px;
      position: absolute;
      flex-shrink: 0;
      svg {
       width: 16px;
       padding: 2px;
       background-color: #fff;
       color: #0daabc;
       border-radius: 50%;
       border: 2px solid #0daabc;
       position: absolute;
       bottom: 5px;

      }
     }
    }
    &-name {
     font-size: 15px;
     color: #fff;
     font-weight: 500;
     margin-bottom: 8px;
    }
    &-info {
     font-size: 13px;
     font-weight: 400;
     color: #fff;
    }
    &-detail {
     margin-left: 16px;
    }
   }
   .search {
    background-color: #fff;
    border-radius: 10rem;
    display: flex;
    align-items: center;
    padding-left: 3rem;
    transition: all 0.3s;
    @media screen and (max-width: 1100px) {
        display: none;
      }

    &:focus-within {
      transform: translateY(-2px);
      box-shadow: 0 0.7rem 3rem rgba(var(--color-grey-dark-1), 0.08);
    }

    &__field {
      border: none;
      background: none;
      font-family: inherit;
      color: inherit;
      font-size: 1.7rem;
      width: 30rem;

      &:focus {
        outline: none;
      }

      &::placeholder {
        color: var(--placeholder-text);
      }
  /*
      @media only screen and (max-width: $bp-medium) {
        width: auto;

        &::placeholder {
          color: white;
        }
      }
      */
    }
    &__btn {
        font-weight: 600;
        font-family: inherit;
      }
    }


  .content{
   width: 100%;
   margin-top: 50px;
   display: flex;
   padding: 10px 10px;
   flex-direction: column;
   justify-content: center;
   align-items: center;
    &__post{
      width: 80%;
      outline: none;
  border-radius: 10px;
  border: none;
  background-color: var(--app-background);
  padding: 10px 10px;
  font-size: 16px;
      margin-top: 20px;

     height: 200px;

    }

    &__btn{
     width: 20%;
     height: 40px;
    }
  }
  #preview {

    display: flex;
    justify-content: center;
    align-items: center;
  }

  #preview .profilepic {
    width: 200px;
    height: 200px;
    margin: 10px;
    border-radius: 100%;
    object-fit: cover;
  }
  #preview .postpic {
    width: 200px;
    height: 200px;
    margin: 10px;
    border-radius: 10%;
    object-fit: cover;
  }
Download a profile picture from undraw.co, name it profile and save it to the assets directory.
Open up your nuxt.config.js file and update the CSS value to
  // Global CSS: https://go.nuxtjs.dev/config-css
  css: [
    'normalize.css',{src:'~/assets/main.scss', lang: 'sass'}
  ],
Here's how my assets folder looks like now

We can now run the app.
After creating an account and logging in, you should see this screen.
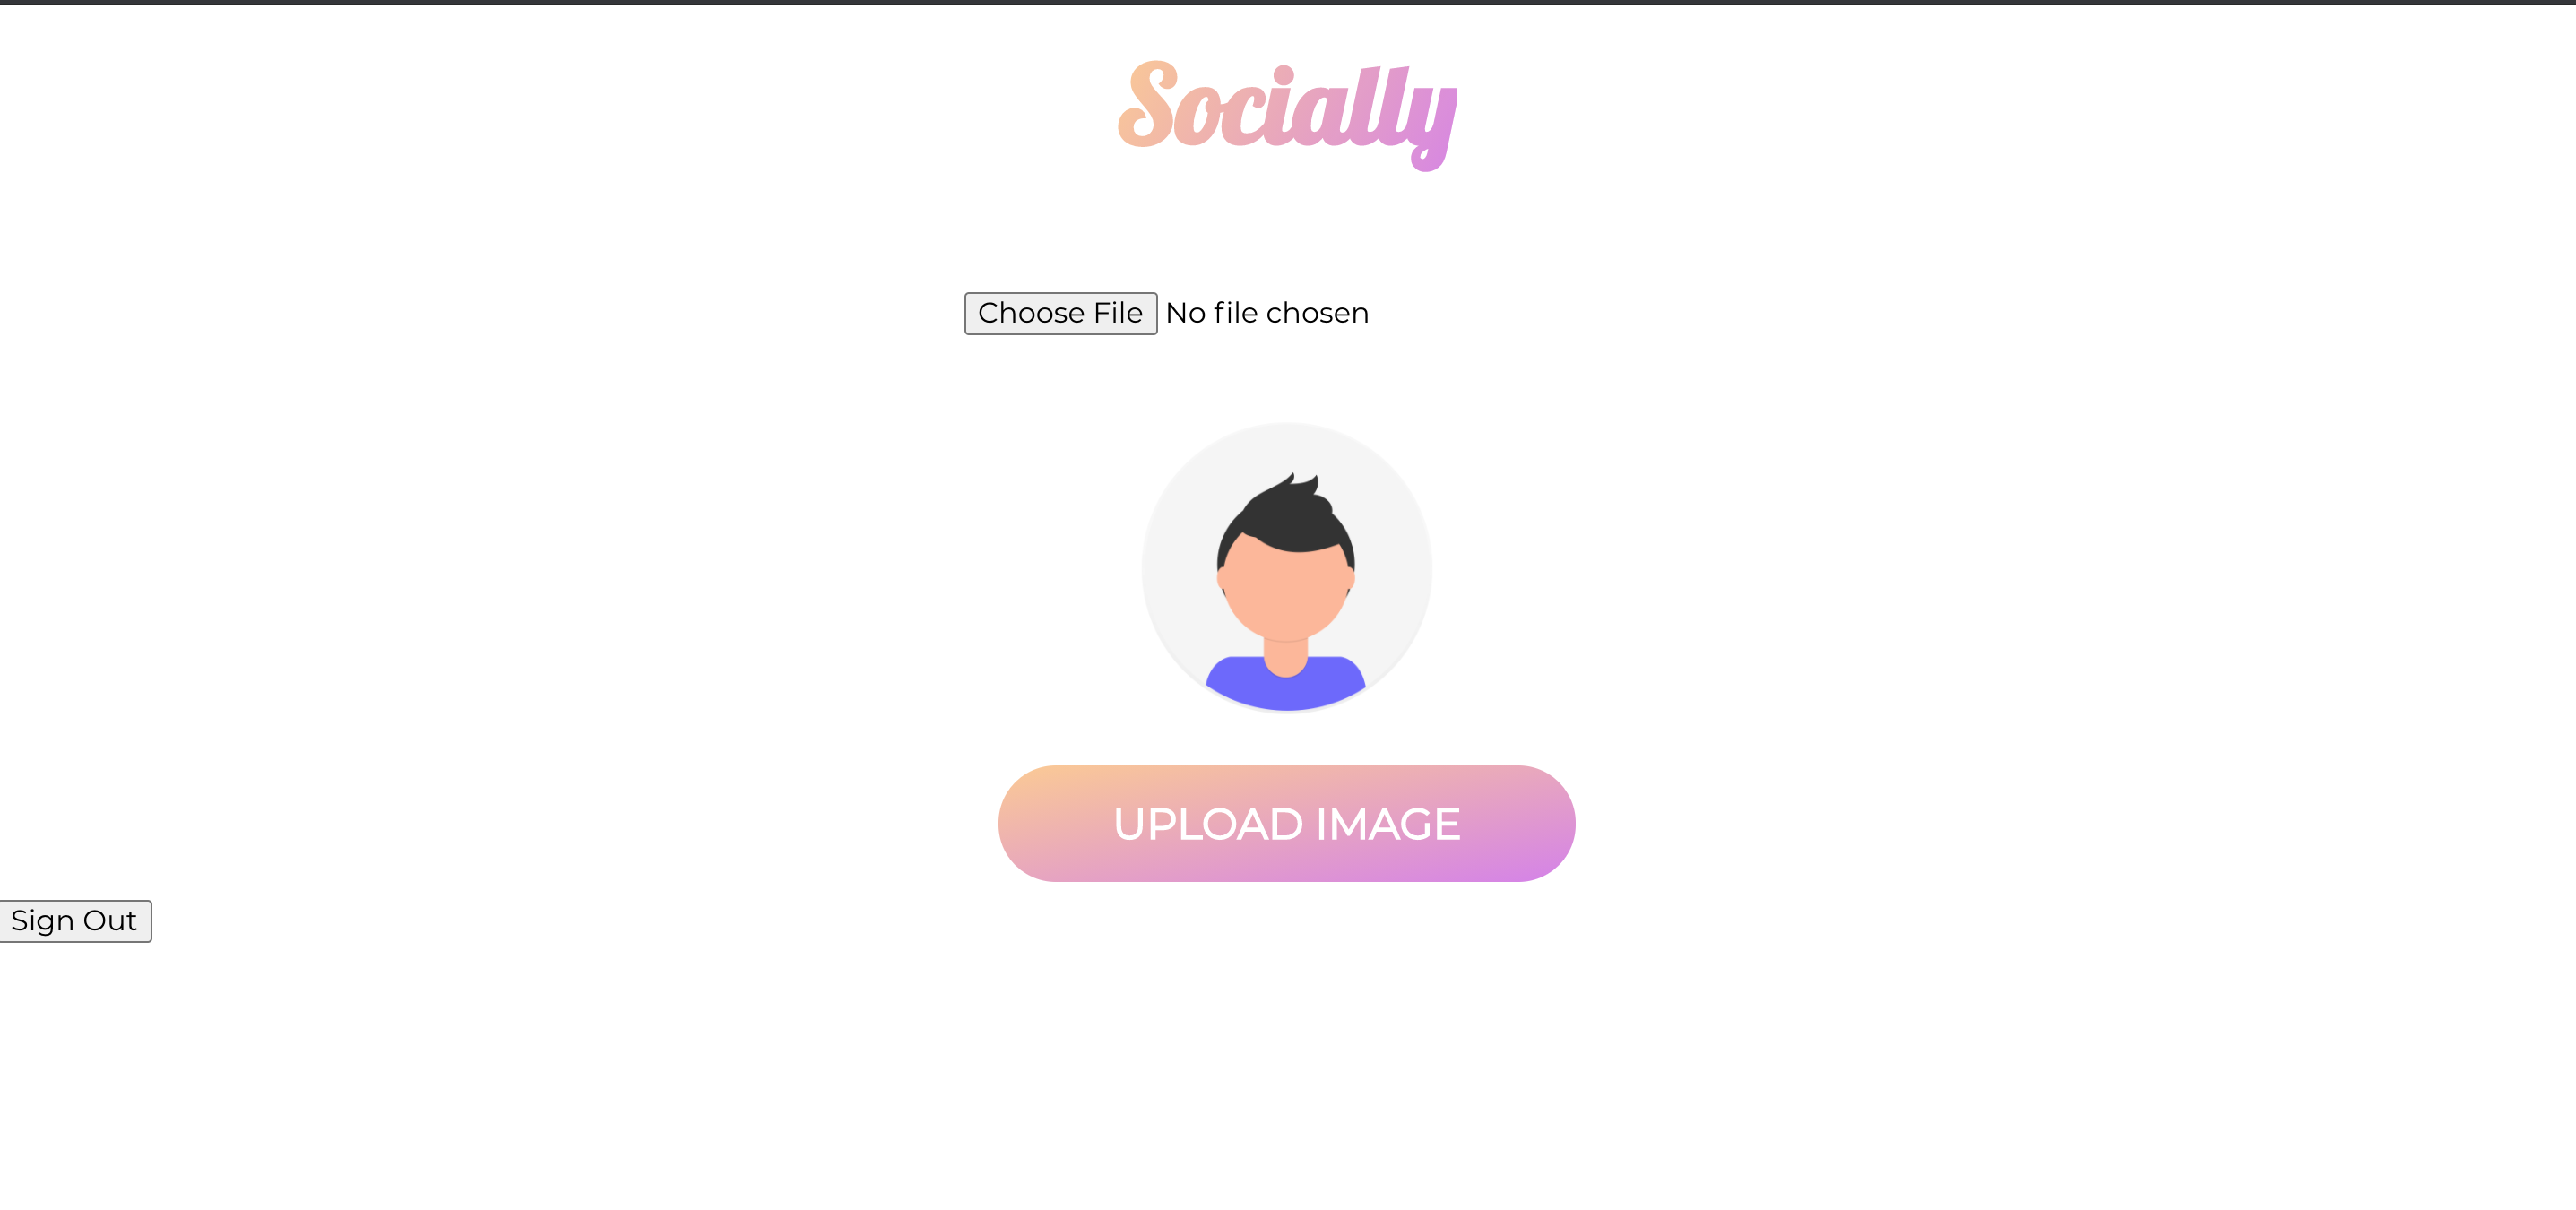 Select a profile picture and click upload image
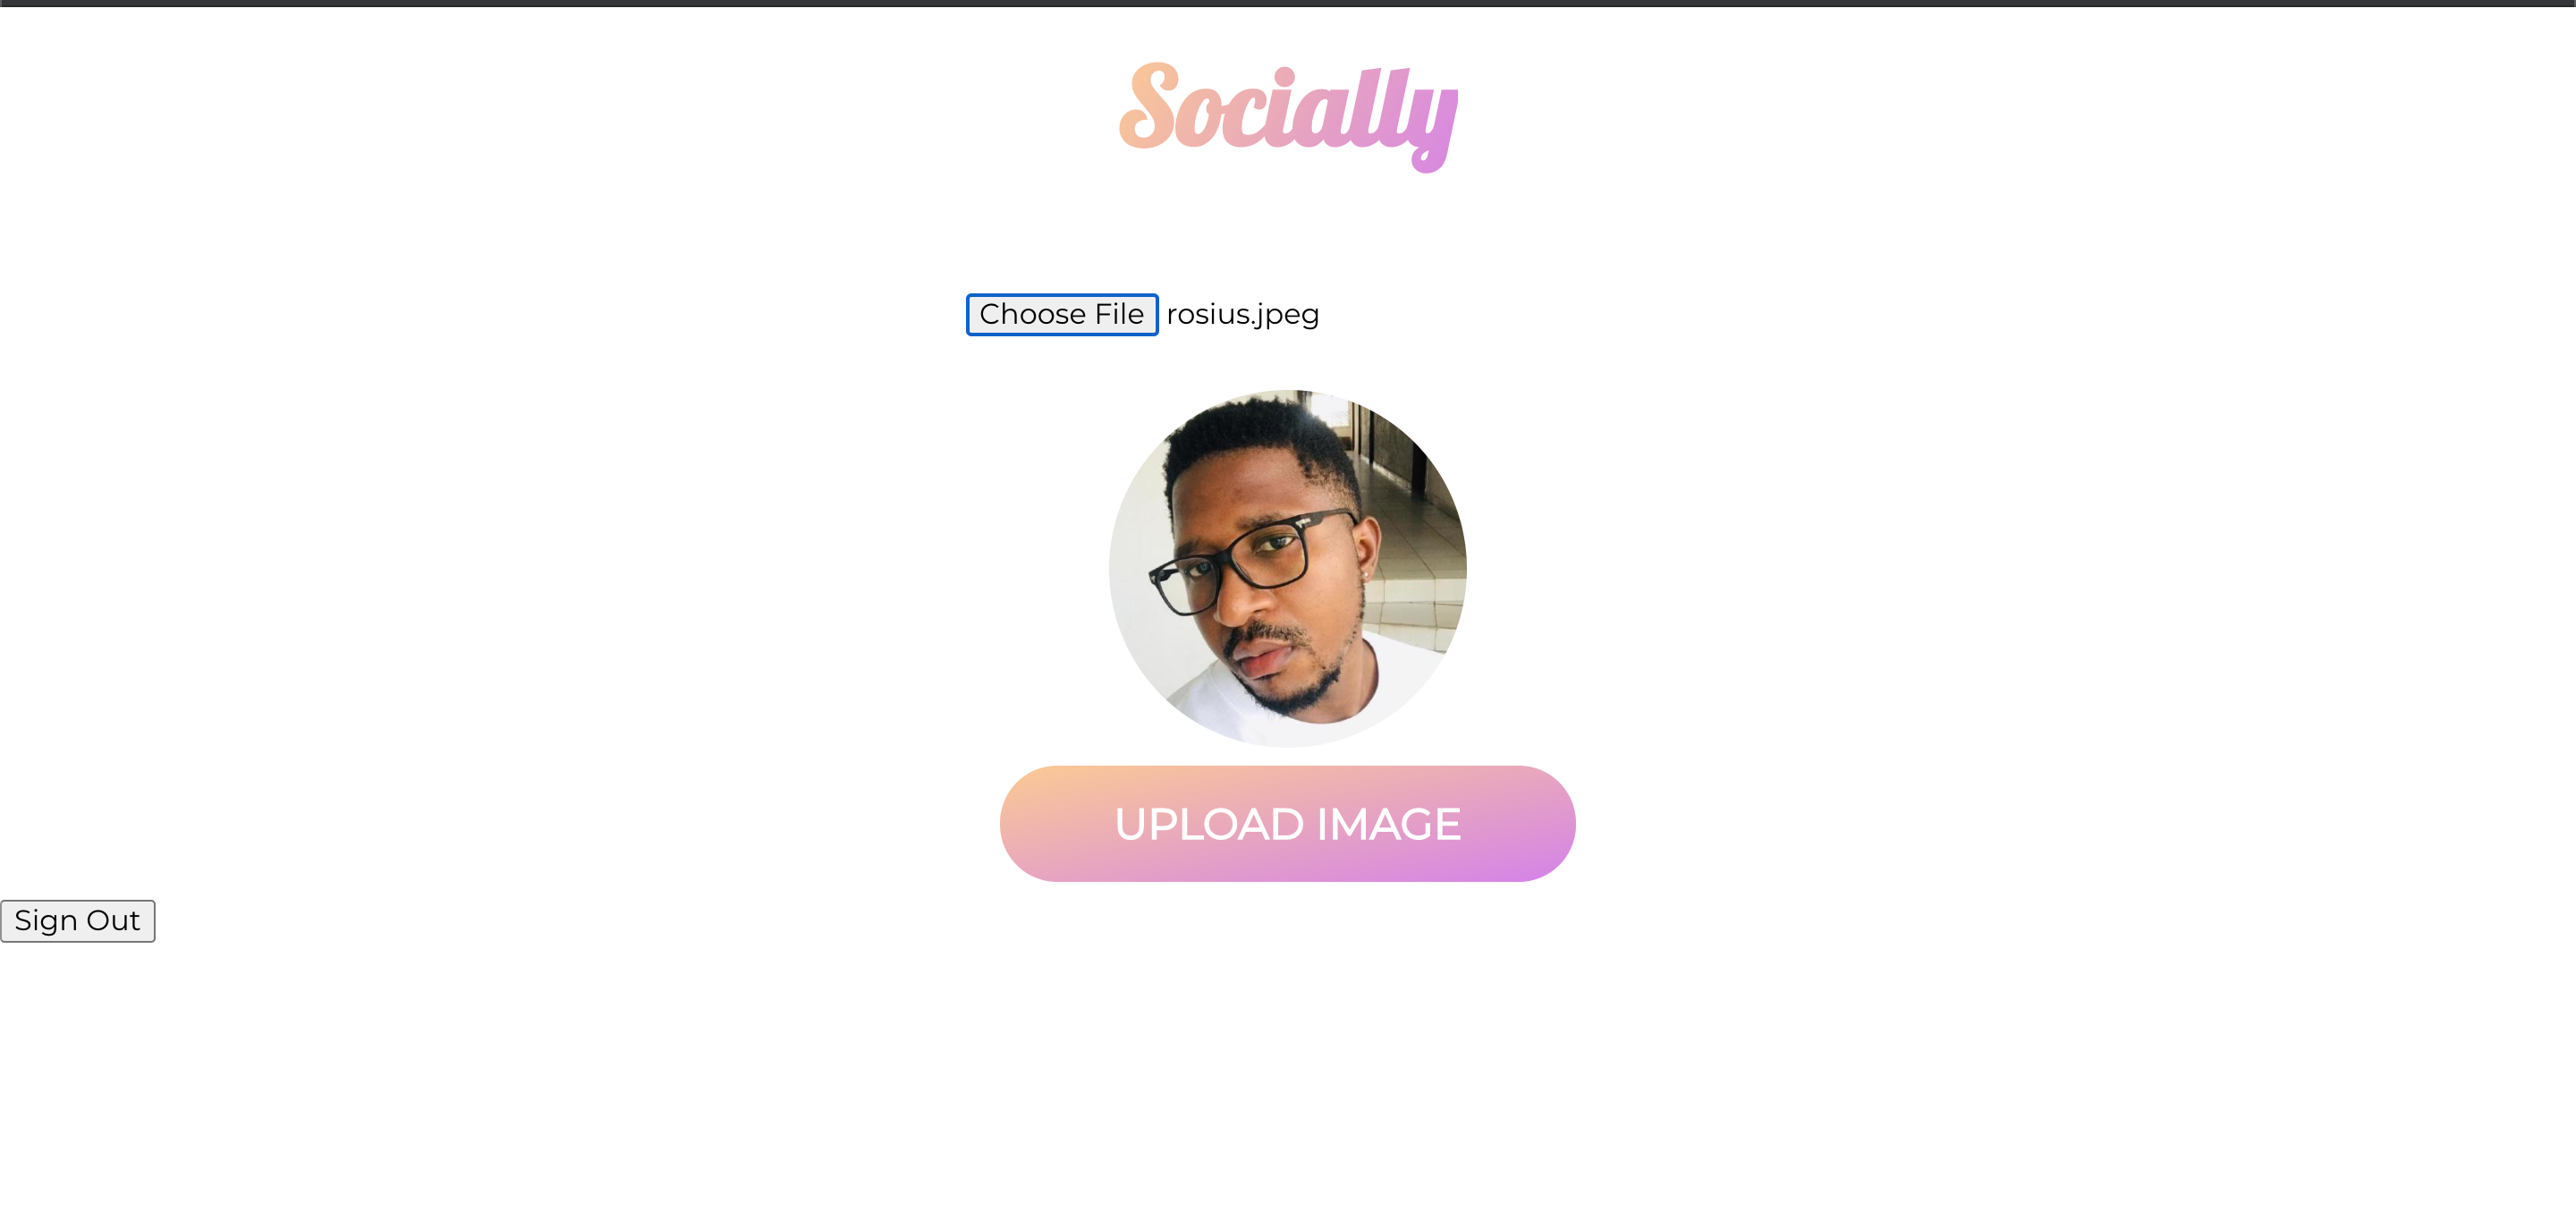 See how good I look in that profile picture😌.
Open up your AWS console, navigate to DynamoDB and click on the user table to make sure the User item was saved properly.
 We'll end here for now.
Conclusion
In this post, we added and tested methods to upload a user profile picture and user details to our s3 bucket and Graphql API respectively.If you found this post helpful, please leave feedback. I'll greatly appreciate it.
Maybe I made a mistake somewhere? Let me know and I'll correct it.
Thanks for reading through.
Till next time ❤️


